Blog

  • 25 Best Housewarming Gift Ideas For First-Time Homeowners

    25 Best Housewarming Gift Ideas For First-Time Homeowners

    Housewarming Gift Ideas From Yard and GarageDisclosure: This post contains affiliate links. If you click through and make a purchase, Yard and Garage will earn a commission, at no additional cost to you. Read our full disclosure here.

    Whether you want to welcome your new neighbors or celebrate your daughter’s first home, the right housewarming gift can really help them get started in style. Finding the right gift can be a challenge, especially if you don’t know them very well.

    In any case, here are some creative, thoughtful and unique housewarming gift ideas for first-time homeowners in 2021 that will help bring smiles.


    New Kitchen Gift Ideas

    Let’s start in the kitchen where there are so many utensils, cookware, and tools that a couple just moving into a house for the first time might not have. These aren’t your typical plates and saucers found on a bridal registry.


    Personalized Cutting Board

    custom cutting board made from bamboo
    Something personalized is a perfect housewarming gift for brand-new homeowners. Give them something of “their own” and the tools they need in the kitchen to make great meals and prepare their favorites with this custom bamboo cutting board.

    The new homeowners can cut their favorite vegetables, fruits and other meal ingredients without damage to their counter or table. Add up to 38 characters that will appear under the cutest Home Sweet Home design. They’ll be sure to thank you.
    That’s My Pan – $13.99


    Tovolo Sphere Ice Molds (Set of 2)

    Tovolo Sphere Ice Trays
    Help the new home-buyers celebrate their new home with ice orbs that keep their wine or other drinks cool for a long time. These sphere ice molds (check price on Amazon) add fashion to any cold drink and melt slower than typical ice cubes.

    They can use them right away and place them in sodas, beer, wine, liqueur, juice, or any other drink they desire.
    Amazon


    Sea Stone Splash Sponge Holder

    kitchen sponge holder crafted from sea stone
    If you really want to help accent their kitchen, this sponge holder is perfect for first-time homeowners and replaces those dull, boring holders with something beautiful to actually look at.

    This artistic sponge holder is made with stone top pieces and a granite base, along with three aluminum rods to hold the stones in place. The sponge wedges in between with plenty of drying space.
    Uncommon Goods – $24.00


    Kitchen Dish Towels Set

    Utopia Black and White Dish Towels
    Another thoughtful kitchen gift idea are a set of soft kitchen towels (Amazon link). Made from 100% natural fibers, these durable towels will leave dishes and linens sparkling clean.

    These dobby weave cotton dish towels are 15 x 25 inches and come in a tasty combo of black on white or black on ivory. Give your friends something to take care of their first big kitchen mess that comes their way.

    Amazon


    Bubble Glass Pitcher

    large bubble glass pitcher
    Everyone needs pitchers for their favorite cold beverages, but how about one that adds flair and style in a way that is different from the norm? Give them a stylish, bubble glass pitcher that feature elegant curves and a handle that graces the circumference with the look of a hole through the pitcher.

    They can use it for parties, to accent their kitchen, and even to decorate with a floral arrangement.
    Wayfair – $41.95


    12-Bottle Bamboo Wine Rack

    natural bamboo wine rack
    Celebrate their home acquisition with a 12-bottle bamboo wine rack (check price on Amazon) that blends with any décor. This rack is available in black (espresso) or natural and is a great way to kick-start their wine collection.

    It can also just provide a place to store existing wines.
    Amazon


    Keurig K55 K-Cup Single Serve Coffee Maker

    Keurig K55
    Everyone needs coffee, but you often have to wait for it to brew. This instant, one-cup coffee maker (check price on Amazon) lets the new homeowners enjoy a quick cup of coffee anytime they need during their busy day working or getting situated in their new home.
    Amazon


    Veggie Smart Storage Containers

    modular vegetable containers
    Help your new friends keep their vegetables and fruits fresh for a longer period of time with a set of smart containers designed to conserve space.

    Each piece stacks together and includes a tall one for lettuce and other large vegetables, a slimmer one for things like carrots and celery, and two small containers on the top for strawberries, blueberries, and more. The slotted bottoms can also serve as a colander while the closable vents on the sides control air flow.

    There are also charts on the lids to help keep track of freshness.
    Uncommon Goods – $55.00


    Polka Dot Stacking Mugs Set

    Set of colorful coffee mugs
    If your new neighbors don’t place these stacking mugs on the counter, they will surely save space in their cabinet.

    The set includes six 11 oz stoneware coffee cups each with a different polka dot design that easily stack in a chrome-plated steel rack.

    They are dishwasher safe.

    Amazon – $29.99


    Monogram Elegance Cookie Jar

    monogrammed cookie jar
    Offer a personalized way to store cookies or other similar treats by giving the new homeowners a chip-resistant, stone cookie jar.

    This white jar is available in six color choices for the custom monogram you choose and it provides an airtight seal to keep the cookies fresh.
    Bed Bath and Beyond – $43.99


    Gifts for the Yard / Outside the Home

    Personalized gifts are always highly valued as they aren’t ho-hum off-the-shelf presents you spent 30 seconds grabbing at Wal-Mart. The recipients will immediately feel a connection with a gift that is unique to them. Here are a couple for the outdoors.


    Family Initial and Name House Doormat

    personalized welcome mat
    Help them welcome guests to their new home with a customized doormat made with an easy-to-clean polyester surface and a non-slip backing material.

    Everyone loves personalization that shows you care and this 27″x 17″ mat includes an initial, a name up to 25 characters, and a 4-digit year for the established line.
    Personal Creations – $24.99


    Q Tech Bluetooth BBQ Grill Thermometer

    Charcoal Companion Meat Thermometer
    Everyone loves to BBQ when the weather allows it. Give the gift of this Bluetooth, wireless BBQ thermometer (check price on Amazon) so that they can monitor the inside temperature of the meat without constantly checking it.
    Amazon


    Whimsical Garden Gnome

    Sunnydaze Garden Gnome Floyd the Fishing Lawn Statue, Outdoor Yard Ornament, 12 Inch Tall
    Help your new homeowner get started on their garden gnome collection with this little fisherman. Floyd comes perched on his rock with his catch of the day still on the line.

    He will be happy to provide your homeowner with some company as they work on their garden or even greet guests as they arrive at the front door. Standing at 12 inches, Floyd can also be brought inside to add a little fun to any nook or corner.

    Check out our continuously updated cool garden gnome list for even more ideas.

    Lighted Copper Flowers Solar Garden Stake

    Lighted Garden Stakes
    Whether the new home is a rental or a purchased one, give them a gift to enhance their outdoor area. This gift available only from Hammacher Schlemmer includes a set of three solar-powered copper flowers. The center of each of the flowers contains a different LED light so it is an energy-friendly way to add color and beauty to the landscaping.

    It is one sure way to welcome them into their new place.
    Hammacher Schlemmer


    Good Living Room / Den Ideas

    Some of these ideas are fun and some are highly practical. These items will get out in the open and be viewed every day so I didn’t go overboard with any odd design choices. Again personalization makes an entrance here!


    Personalized Monogram Wall Key Holder

    personalized keychain holder
    Help your new homeowner(s) know where their keys are at all times. This customizable, wall-mount key hanger features four metal hooks and will add that extra touch to the home while also helping them stay organized.

    The MDF material creates a smooth surface and the background can be customized to match the home.
    Etsy – $19.95


    Three Tier Tabletop Fountain

    Sunnydaze Black Three Tier Cascading Small Tabletop Fountain with LED Lighting, 9 Inch
    The flowing water of a fountain can add a sense of tranquility to any home. This tabletop version is a great housewarming gift.

    The water flows over each of the three lily designs to a basin below. It even has a LED night so the fountain can provide a focal point even in the evening.

    Since it is a tabletop fountain there is no need for plumbing and each tier can be easily removed for cleaning. Your new homeowner will be able to enjoy their new gift immediately.


    His and Hers Key Holders

    wall mounted his and hers keychain holders
    For those that want to give a key holder that is unique and different, this set is the ticket to make the new homeowners smile. The his-and-hers pieces mount directly on the wall and include actual locks to insert the keys while the rest hang down like they do in your car.

    They just pluck them out easily and quickly when they need to go. Each piece features a zinc base with a protruding person that delivers a mirrored reflection made from chrome.
    Uncommon Goods – $17.00


    Marble Coasters (Set of 4)

    Marble coasters set
    Everyone needs coasters to protect beautiful surfaces from drink condensation damage and beverage drips that run down the side.

    Welcome your new neighbors with a beautiful, durable set of marble coasters, featuring a classic white design that blends with any house theme. The hexagon shape also serves as a nice change to the traditional square or circular varieties.

    Each coaster includes 4 foam feet to protect any surface they place them on.
    Couleur Nature – $50.00


    Bliss Gardens Air Plant Terrarium Kit

    Terrarium Kit
    Give new homeowners something to do and something to accent any room they desire with this beautiful glass terrarium kit (check price on Amazon) that features colorful plants and a 4-inch round design.

    It easily fits on shelves, counters, tables, and more. The purple, awe-inspiring Amethyst gemstone adds life and beauty in conjunction with the Tillandsia Air Plants that help purify the air around the room.
    Amazon


    Rustic Home Framed Print

    framed picture with the word Home in the center
    Give new homeowners something to enhance their living room, hallway, or a bedroom like this rustic home framed print with a black, wooden frame and a glass cover.

    The print is customizable up to 25 characters and is often used for the family’s name.

    It has quite a few positive reviews so your new neighbors will surely enjoy it.
    Personal Creations – $38.99


    Where Memories Are Made Throw Pillow

    throw pillow for housewarming gift
    Give the gift of comfort with a 15-inch, personalized throw pillow that features the words “Home is Where Memories are Made.” Customize it with 16 characters underneath that and a year for the established line.

    They will enjoy it because the canvas is made of 100% cotton and it can be used anywhere they desire without affecting the theme of the room.
    Personal Creations – $34.99


    Better Homes & Gardens Mosaic Glass Stake Light

    Mosaic solar stake light
    Whether the new home is a rental or a purchased one, give them a gift to enhance their outdoor area. This Better Homes & Garden solar stake includes an orb with amazing mosaic detail. And they’re actually so inexpensive you can grab a few and still not break the bank.
    Walmart – Under $20.00


    Custom Home Accent Light

    tabletop accent light
    When you have some new homeowners to celebrate with, this personalized, tabletop light does the job well.

    It’s made of wood and acrylic materials and you can personalize for them with any message up to 25 characters that will appear below the home image. It measures 10-1/4″ wide by 8-3/4″ high.
    Personal Creations – $49.99


    Google Chromecast Ultra

    Chromecast Ultra media device
    This one may be slightly off to the far side of housewarming gifts, but it definitely makes a good one. Everyone needs access to the entertainment they love and the Chromecast Ultra gives the new homebuyers access to all their favorite videos, movies, and shows.

    It mirrors their Android or iPhone devices so they can sit back on the couch and enjoy that long-needed binge break or browse pictures on their phone.
    Google – $59.00


    Printer’s Home Office Letter File Bin

    wall mounted file bin
    Organizing is one thing that everyone can benefit from and a letter file bin is a perfect addition to keeping an office or room free of clutter.

    This new homeowner gift is made of pine with a Tuscan chestnut finish. It features two roomy slots for mail, letters, and other paper materials. Give them easy access while also giving them less clutter and less lost mail.
    Pottery Barn – $99.00


    One Last Thing

    I hope one of these gift ideas will make these new homeowners feel welcome. The personalization of some of the gifts is a nice touch and everyone loves a piece of unique home decor.

    Need even more gift ideas? Try the Gift Idea Generator from Generators List. Click endlessly to get new gift ideas.

    What have you given as a housewarming gift recently? Let me know in the comments below. I’m always looking to keep track of good ideas for welcome gifts as we live in a military town with a lot of turnovers.
    —-
    Pinterest Image
    Housewarming Gift Ideas

  • Best Tool Chest Under 500 Dollars (2022 Edition)

    Best Tool Chest Under 500 Dollars (2022 Edition)

    best tool box under 500 dollars

    You’ve invested a lot of time and money into choosing the best tools for your projects. They deserve a great place to rest in between the times you need them.

    How about treating your tools by getting one of these handsome storage options?

    Tool Chests Under $500 Reviews

    [amazon table=”812″][amazon table=”832″]
    These are the best tool chests under $500. After all, you need a place to store your favorite gadgets and gizmos that you need to get your jobs done right and keep them both handy and protected for many years to come.

    Keter 5-Drawer Modular Tool Chest

    This handsome, sturdy, and durable Keter 5-Drawer Modular Tool Chest is quite the workhouse addition to your workshop. There’s plenty of storage, durable wheels for mobility, and you can detach the top from the bottom to move it where you need it to go.

    Review:

    There’s a lot to like about this Keter 5-Drawer Modular Tool Chest. It’s meant for heavy-duty and long-lasting storage, so it will protect your tools and equipment in garages, basements, utility rooms, and workshops. It’s made out of durable polypropylene which has been strengthened with resin. This is heavier than regular plastic and also helps protect the tool chest. Even if it gets wet, your tools are protected.

    Speaking of protection, there’s also a central locking system so that each drawer stays secure. The bottom drawer is the deepest for extra storage, while 16 removable smart part bins and dividers are included to create separate smaller compartments. You can wheel it on the four included steady casters, or detach the top and move it elsewhere. It has handles that lock into place. This tool chest measures 22.1″ L x 11.3″ W x 23.5″ H with the wheels on and 22.1″ L x 11.3″ W x 19.8″ H without the wheels on. It weighs 25.5 lbs. empty.

    With all these features, it also has negatives. While it is made of plastic, it doesn’t have the strength and durability that metal tool chests have. It will protect your tools but it’s not fully waterproof. Also, this tool chest is a bit on the small side, so it’s only good sized for hand tools, not larger power tools, and drills. But, for those who have these needs, it’s one of the best tool chests under $1000.

    Pros:

    • 5 drawers for plenty of storage
    • Drawers are lockable
    • Side carrying handles
    Cons:

    • Not waterproof
    • Made of plastic
    • Only big enough for hand tools

    YouTube Review video:


    Craftsman 3-Drawer Metal Tool Chest

    Of course, we had to include at least one classic in our quest for the best tool chest under $500. When you hear the Craftsman name, it still means quality after all these years. That’s the same for this exceptionally heavy duty and well-designed 3-Drawer Metal Tool Chest. You’re buying a piece of equipment that’s built to last and will store your tools for decades.

    Review:

    Many buyers are looking to not just replace an existing Craftsman tool chest they already own, but add another to their collection. This box is ideal for either buyer. It comes in cherry red, with a black handle and metal hardware accents. There are three drawers included, and the whole tool chest is made of metal. Open the lid, and there is a nice large compartment for easy access storage.

    The three drawers are wide but thin, so you can see everything. They glide out easily and close easily, too. When you close the lid, the drawers lock automatically for safety and convenience. Two large metal latches hold the lid firmly in place. This tool chest measures 23″ W x 14″ H x 11″ D, with a shipping weight of 19 lbs. It’s heavy even when it’s not filled!

    Even with a Craftsman, there are negatives. It is made in Asia, not the USA. Also, there are no wheels, and it is very heavy. So make sure that the first spot you put it is the last! The drawers are shallow, not even 3″ deep, so it won’t fit larger tools or power tools. This is a strong, solid metal box that would be an excellent smaller tool chest in addition to someone’s collection.

    Pros:

    • High-quality parts
    • Heavy duty
    • Drawers operate smoothly
    Cons:

    • No wheels
    • Heavy when empty
    • No drawer compartments

    YouTube Review video:


    Montezuma 22 1/2 Inch Triangle Toolbox

    High quality steel construction, triangular lid design and gas springs for easy tool access are just some of the great details you’ll find in this Montezuma Portable Triangle Toolbox. It’s a nice, high-end box that is the perfect accessory for tradespeople, mechanics or just the at-home DIYer who is serious about their tools.

    Review:

    The patented triangular lid design is what sets this Montezuma Portable Triangle toolbox apart. It’s this particular lid design that ensures all your tools stay in position rather than get jumbled about when you’re on the move. It has this great multi-tiered design with additional storage underneath a socket tray with inner gas springs. It is fitted for both S.A.E. and metric tools so you can hold full sets if necessary. It is weather-resistant due to a seal on the lid so the elements can’t get to what is inside.

    The tool chest is is made with heavy-duty steel with seams that are professionally welded. No spot welds on this toolbox. It also has a special powder coating to that will protect this chest from getting scratched. As for size, this tool chest measures 13″ W x 22.5″ D x 14.1″ H, with an empty weight of about 50 lbs., so it’s solid and heavy for years of proper use.

    There are some negatives, even with this rugged and durable tool chest. It doesn’t have any wheels or casters and can be heavy when filled, so it should be placed in a location where it won’t be frequently moved. It’s best for tool owners looking for a durable box to use in a garage, flat-bed pickup or other work vehicle.

    Pros:

    • Innovative triangle lid design
    • Multi-tier design
    • Heavy-duty steel construction
    Cons:

    • Not easily portable
    • Quite heavy

    Stalwart 75-4650 Portable Tool Chest

    Stalwart has created a really interesting, mobile, and modular oversized portable tool chest with this striking model. There are three toolboxes in one, it has wheels for portability, and there’s plenty of storage in the three deep drawers.

    Review:

    The Trademark Tools Oversized Portable Tool Chest is large and stable. After you wheel it to the spot you need, you can easily stand it upright and it won’t tip over. Each of the three drawers separates into distinct toolboxes. The bottom drawer is more like a bin that tilts out and is connected to the rear wheels.

    You assemble the smaller two drawers on top, and they lock into place. There’s an adjustable carrying handle in the back, very similar to a rolling suitcase. The top box measures 19.5″ x 9″ x 7″, the middle box measures 19.5″ x 9″ x 9″, and the bottom box measures 19″ x 9″ x 13″. In size, when fully assembled, this tool chest measures 28″ H x 19.5″ W x 11.5″ D, with an empty weight of 25 lbs.

    We also find some negatives, even with this large and expansive tool chest. It is not attractively designed, so this is much more utilitarian than one made out of wood. It’s best for a garage, basement, or utility room where the function is more important than aesthetics. It’s also made of plastic, which isn’t as durable as metal. This is not the heavier duty polypropylene plastic, but more like the type of plastic used for lidded tubs. It’s not weatherproof.

    You can’t wheel this tool chest up and down stairs due to the wheel design. It has to be physically lifted. In all, however, we appreciate the clever design, ample storage, and mobility of this tool chest.

    Pros:

    • 3 tool chests in one
    • Detach each box
    • Wheels for portability
    Cons:

    • Not attractive looking
    • Made of plastic
    • Not made for stairs

    Handyman Heavy Duty Steel Toolbox with Chests and Roller Cabinets

    When you think workshop tool chest, the Handyman Heavy Duty Steel Toolbox with Chests and Roller Cabinets is what comes to mind. It has seven drawers, two trays and a large cabinet throughout its double level design. It has four omnidirectional wheels, a side handle, and is manufactured in a striking solid red color.

    Review:

    You’ll enjoy all the storage in this Handyman Heavy Duty Steel Toolbox with Chests and Roller Cabinets 4 Wheel Casters Chest. It has three large drawers, three small drawers and one large box drawer that are lined with an absorbent material that can soak up excess oil or other liquids.

    The drawers are kept locked and in place with a top lock and key giving you extra security and peace of mind that your contents are secure. The body of the storage tool chest is made out of heavy duty steel and is resistant to scratches, corrosion, and light weather. On the bottom of the tool chest are four sturdy swivel casters of which two have locking capabilities. You can wheel it anywhere to set it up in the location of your choosing. The size of this tool chest is 24″ W x 13″ D x 43″ H, with a fairly heavy weight of 57 lbs. when empty.

    This is a great tool chest, but it also has some cons for buyers to be aware of. The assembly is somewhat difficult for most people and the steel construction is not durable enough to withstand industrial use. We’d recommend this tool chest for those who need normal household tool storage on wheels.

    Pros:

    • Durable and heavy duty
    • Four caster wheels that lock
    • Top section can be used independently
    Cons:

    • Difficult Assembly
    • Bottom section does not lock
    • Not for industrial use

    Our Pick for the Best Under $500 Tool Chest

    We hope you’re as pleased with this excellent selection of tool chests under $500 as we were. You get a variety of brands, design styles, materials, and storage capacities.

    We’ve compared all these features, and come up with a clear winner as the best tool chest for the money: the Craftsman 3-Drawer Metal Portable Tool Chest. Despite it being heavy with no wheels for mobility, you can’t overlook the durability, deep drawers, and long-lasting metal construction.

    It’s also designed well, with the traditional red color and sturdy black drawers. This Craftsman tool chest has plenty of storage and will quickly become one of your favorite storage options in the garage, basement, or workshop. It’s the clear winner!


    Pinterest Image:

    Find the best toolbox under 500 dollars

  • Keep Your Home Appliances in Great Shape: 11 Top Tips

    Keep Your Home Appliances in Great Shape: 11 Top Tips

    kitchen appliances


    Disclosure: This post contains affiliate links. If you click through and make a purchase, I’ll earn a commission, at no additional cost to you. Read our full disclosure here.

    It’s a headache when one home appliance after another develops a malfunction. Sadly, some modern appliances aren’t intended to last more than a few years; welcome to throw-away society! Manufacturers rely on increasingly cost-effective but less durable components and materials. Correspondingly, appliance prices have fallen dramatically since the early 1990s, but it’s of little comfort if the items you own are always letting you down.

    Product warranties, too, are growing commensurately shorter, reflecting the expected curtailed lifecycles. Regular product turnover aids the makers’ innovation cycles and profit margins, so the sad fact is, they’d rather sell you new machines than breathe new life into your aged household friends.

    However, despite all the odds being stacked against you, there are still many households in which appliances rarely stop functioning. The reason’s simple: these homes go to extra lengths to look after their electrical goods.

    Here are 11 tips to ensure your appliances live long and healthy lives.

    1. Read the instructions.

    worker reading instruction manualYou’re dying to try that new appliance but–wait! Variations between models and brands mean what’s good for one can prove a death sentence for another. Flicking through the user guide prior to first use isn’t a tall order.

    Attn: Appliance Manuals
    If you lost or misplaced the instruction manual to your appliance, Sears PartsDirect has a huge variety of owners manuals that are available for free.

    As appropriate to the appliance type, read about correct assembly, how to clean the appliance and its filters, explanations of the display and warning lights, ideal storage temperatures, safe loading and unloading, maximum weights and operating times, troubleshooting, and when to request repairs.

    Operating manuals for machines that take consumables–things like dishwashers, washing machines, and tumble dryers–also often recommend the brands and product types best suited to the appliance.

    2. Keep cool and dry.

    Keep appliances in cool–not cold–spaces. Unless they are designed for it, garages and outhouses can be too chilly and draughty, especially if appliances rely on lubricating grease or oil.

    Install appliances inside the house, away from direct heat. Even inside a home, location is everything. Condensation is a major appliance-killer, so if the area’s chilly, install a tubular glass heater; these are ideal for areas needing low-cost, steady background heat, and they keep the frost and condensation at bay. In a slightly-warmed room, grease and lubricant remain fluid and appliances don’t build up moisture on their cabinets or moving parts.

    Install major appliances in spaces where they can breathe, and keep an eye on operating temperatures. Tumble dryers are prone to static build-up and overheating.

    3. Monitor appearances, sounds, and smells.

    If you notice rust, mold or mildew on appliances, take care. If the unit’s showing damp or rust externally, how might it look beneath its casing? Wipe casings, rubber joints and seals frequently, checking for pitting and corrosion; this applies to rubber parts the same as metal ones.

    Listen to units when they’re working properly, noting their sound; if something starts making odd noises, call a repairman. Don’t dismantle items yourself unless you have no warranty, as owner interference invalidates product guarantees.

    However, if you do open your appliance up, vacuum it out. Only use a light air blower on small componentry; the air blower is a small, usually gas-powered canister emitting compressed air, and is available at low cost from computer suppliers.

    Clean and lubricate moving parts before reassembling and testing.

    Don’t continue running any appliance that’s making strange noises. Usually, this is the precursor to a motor breakdown or overheating. Similarly, if you smell burning, stop using the appliance pending further investigation and testing by an approved repairman.

    4. Observe weights and usage conditions.

    Observe the weights that washing machines and tumble dryers can accommodate. Laundry soon doubles or trebles in weight once wet, and if your appliance is struggling to make its drum turn, you’ve overloaded it or the laundry needs more even distribution. If there’s groaning, squealing or straining, the motor is under duress; that’s your appliance’s SOS call.

    Observe ‘maximum fill’ markings on vacuum cleaners and don’t keep using them when they require cleaning or emptying.

    5. Keep air vents clear.

    Small appliances like hairdryers, curling tongs, and even some straighteners may have air vents; check all over to see if you can spot any, and keep these free of dust, hair, and debris, otherwise, the appliance could burn out. If something goes up in flames in your hand, you’ll know about it!

    While unplugged, inspect DVD players, satellite boxes and music players, running a lightly dampened cloth across air vents and grilles, ensuring no dirt or debris build-up. Again, an air blower may be better suited to this job than your vacuum cleaner.

    Glance inside your hairdryer while it’s in operation; if its heat filaments glow, it has insufficient free-flowing air and is running too hot. The same applies to fan and convector heaters.

    6. Clean filters, brushes, and outlets.

    cleaning vacuum brush rollerFilters are present in tumble dryers and washing machines–the latter also have coin traps many people don’t even know about!–and in toasters, some kettles and all vacuum cleaners. ‘Digest’ user guides and be aware of filters’ locations. If you don’t clean or renew filters, you’ll encourage dust and debris build-up in the motor compartment.

    In addition to as many as four filters, modern, bagless vacuum cleaners have the added complexity of air-powered or motorized brushes. If vacuum cleaner brushes are not kept free of hair, a build-up causes slow turning, stressing and overheating the motor.

    It’s easy to clean hair from brushes using an old fork and a pair of scissors; ease the fork prongs beneath the hair, pull the matted hair towards you and snip it free. To finish, a drop of motor oil or even olive oil at connecting ends of the cleaner brush prevents stiff, friction-causing brushes.

    Washing machines can suffer build-ups of fabric conditioner or detergent in the soap tray and around the coin trap and drain; keep these areas clear. Pop your machine’s detergent drawer into the dishwasher occasionally, having first cleaned it of built-up residue. The hot wash will remove bacteria and mold spores that can attack internal parts.

    Dishwashers need care too; check there’s nothing in the filter or blocking the drain outlet. If a glass has smashed in the appliance, carefully check for fragments as these will slice their way through your dishwasher’s moving parts and cause leaks or blockages. If they end up in the drain pump, the appliance will stop draining.

    7. Use domestic appliances domestically!

    Domestic vacuum cleaners are not equipped to handle brick or DIY dust or debris, wet or damp surfaces, or even carpet cleaning powders; they’re called ‘domestic’ appliances because their use is limited to standard household applications.

    If your home doubles as a business, or if you’re cleaning at work, buy industrial appliances from office and workspace suppliers; they’re less stylish but more robust.

    Carpet cleaning powders aren’t safe domestic appliance products. Their abrasive nature at the microscopic level can destroy your vacuum cleaner’s motor, and the small print on some powders indemnifies the manufacturer against claims for damage to domestic appliances.

    The same applies to insect-killing dust; this works by breaking through the insect’s shell or carapace. Seen under a microscope, those innocent-looking dust particles have razor-sharp, or toothed edges that chomp away at your precious gadgets.

    8. Oh, rats!

    mouse in an old sweater on the floorKeep appliances free of rodent and small animal access, including the house bunny, hamster and pet mouse or rat! Rodents will spy those lovely cables and sink their teeth in. The next time you plug in, there’ll be a nice bang, or a big fat–nothing. Many pedigree cats also have a strange cable-chewing penchant.

    9. The long and the short of cable care.

    Ensure long cables aren’t trapped beneath appliances or they’ll perish. Wind long cables around holders screwed to the wall, and carefully ease appliances towards the wall, leaving a gap. Don’t overstrain short cables; there should be some slack.

    With units unplugged, wipe down cables with a damp, clean cloth occasionally, ensuring no damage. Extension cables–especially those housed on wind-out mechanisms–lead to overheating and fires. If you must use one, check it’s fully extended and isn’t getting hot. Use thermal-cutout adaptors, so appliances shut down at signs of temperature trouble. Check electrical plugs are tightly screwed and haven’t become a home for spiders and slugs.

    10. Tomcat turmoil.

    Unneutered or late-neutered male cats often spray urine over electrical units, disabling them. Prime candidates are computers, keyboards, speakers, and video or DVD players.

    If you have a high incidence of household gadgets ceasing to function without prior warning, check for sticky, unpleasant patches and take your male cat to the vet for his overdue surgery.

    11. On the level.

    bubble level
    Keep ovens, washing machines and tumble dryers on level, solid surfaces. If the item has moving or rotating parts, discrepancies in standing surfaces place strains on the motor, suspension, bracketing, and feet. If your washing machine or dryer shudders or hops as it operates, it has a wobbly leg or is standing on an uneven surface.

    The same can happen with a microwave oven’s rotating turntable; is it making a strange sound when operating? The chances are, it’s not sitting flat so the turntable motor is under duress.

    Now you’re taking great care of your precious appliances, consider locking the portable ones away from people who won’t be so respectful. Cheaper, slightly less effective small appliances can be retained for visitors, the cleaner, and your accident-prone husband or teens.

    If you really want to cover all bases, call in a domestic electrician once a year to carry out a house-wide small appliance safety test, sometimes known as a Portable Appliance Test or PAT test. The electrician will check each appliance and mark it as ‘passed’, so you’ll know every item’s safe.

    Whatever system you put in place, treating appliances with tender loving care will afford them long life and ensure they give good service whenever you need them.

  • Outdoor Entertaining Ideas for New Homeowners

    Outdoor Entertaining Ideas for New Homeowners

    grilling as part of outdoor entertaining ideas


    It’s only natural for a new homeowner to want to invite friends and family over for a summer get-together at their new home. It’s wise, however, to think about how entertaining will impact the neighborhood.

    The last thing that a newbie to the community wants is to upset neighbors because they were inconvenienced, or disturbed, by the gathering. It’s a bad way to start out, and will only lead to problems down the road.

    To avoid problems, and establish themselves as the polite newcomer to the neighborhood, and a responsible homeowner, there are a few things new homeowners need to keep in mind before coming up with outdoor entertaining ideas at their new house.

    Be Considerate

    Summertime is spectacular, and spending those beautiful days with friends and family only makes it better. Making sure that a get-together doesn’t cause trouble between with the new neighbors is imperative.

    Now is the time to make a good impression, to begin building a peaceful, kind relationship with these people that will last many years. Starting out on the right foot means treating the neighbors with respect. It doesn’t take any special effort to be polite, considerate and thoughtful.

    Notify the Neighbors

    In some areas, the homes are particularly close to one another, and it might be a wise idea to let the neighbors know about your planned event. Of course, if you’re only inviting a couple of people, that might not be necessary.

    If the party is going to be a big one, letting your neighbors know, and even inviting them over, will go a long way towards keeping the peace. Offer a general timeframe for the event and let them know who to talk to if there are any issues.

    Reassure them that if anything comes up, the problem will be solved immediately.

    I cannot stress enough how important this particular bit of advice is. Even if your neighbors are notified, if the party gets a little out of hand or goes long, they may reach out to local law enforcement to complain. You want to be able to explain that you did let all of your neighbors know in advance.

    The Guest List

    Although it might sound great to invite 50 people over to hang out for the afternoon, it might not be the best idea. Keep in mind the amount of space available in the yard, as well as inside the home.

    It’s best to keep gatherings smaller so that there’s enough room for people to move around and mingle. Some families are just too big for the backyard. Rather than trying to fit everyone in at the same time, make it a monthly event that includes different numbers, or groups, of people each time.

    backyard gathering

    Prepare the Space

    Before the big day, it’s essential to prepare the yard and outdoor entertainment areas. Rake any sticks and other yard debris from the grassy areas and anywhere guests might walk around. Sweep the deck or patio, and give it a good cleaning with some appropriate soap and water applied with a scrub brush, pressure washer, or wide broom.

    If your party is at night, make sure all pathways and danger areas, like around grills, are safely lit.

    Give the patio furniture, grill, and prep areas the same kind of attention. Mow the lawn, pull the weeds and plant a few flowers to make the scene look inviting.

    Timing Is Everything

    Scheduling your outdoor event too early in the day means some people won’t be able to make it. Plus, the host and anyone helping with preparations will also have to get up early to get things ready.

    Likewise, an evening soiree won’t appeal to some of them, and a long day of prepping will leave everyone exhausted.

    Somewhere in the middle of the afternoon might be the sweet spot. It allows them time to take care of last-minute cooking and prep work, and maybe even a little quiet time to mentally prepare for the event. Since it’s still early in the day, it won’t be a huge bother to the neighbors while it’s going on.

    Plan for Parking

    Guest parking might become an issue, especially in a city. There may only be a small number of parking places available, and too many cars will create congestion and annoy the neighbors who usually park there.

    One way to overcome this problem is to locate a public parking facility close by, and shuttle guests to the party and back. Parking vehicles in the yard is a good option in a rural setting, providing it isn’t wet, sandy, or otherwise unsuitable.

    Seating Arrangements

    Without adequate, comfortable seating for guests, a backyard barbecue isn’t going to last too long. One option is to ask people to bring their own chairs along so they have a place to sit. It will still be necessary to provide tables to prepare, serve and eat food.

    The easiest way to remedy the situation is to rent tables and chairs for the day. Many rental companies also offer pop-up shade canopies and other equipment like grills, lights, and even sound systems. The best part is that they’ll often deliver everything, and pick it all up after the party.

    Monitor Noise Levels

    When larger groups of people get together, things can get a little loud, especially if there is music playing. Be a considerate neighbor and keep the volume down to a moderate level.

    Remember that sound carries, so encourage guests to keep their voices down, so they don’t disturb the neighbors. If kids are running around, keep the screeching to a minimum. Above all, don’t let a dog bark continually; whether you’re entertaining outdoors or not, it’s a sure way to upset the neighbors.

    Cooking for a Group

    Even for people who love to cook, a large meal for several people is a huge task to undertake by alone. The best thing to do is to start a couple of days ahead of time to avoid becoming overwhelmed and stressed out on the big day.

    Alternatively, ask everyone to bring a covered dish to pass, and supply only the main meat course. That way, the guests can show off their culinary talents, and you everyone gets to sample a variety of dishes. Either way, keep the menu basic and serve the foods that are most popular among the group invited.

    Managing Leftovers

    There is almost always food left over after a large family meal, and the host probably doesn’t want to keep all of it. Of course, those who bring a dish to pass can take their items home, but sharing is also great.

    To make it more convenient, consider providing lidded plastic containers for guests to take away. If there’s a substantial amount of food left, consider donating it to a local agency. That way, no one ends up getting stuck with more than they need or want. Plus, it helps to limit or eliminate waste.

    Adult Beverages

    For many people, a cold beer goes perfectly with a grilled burger and fresh potato salad. However, having too many adult beverages could lead to rowdiness and noise. While it’s perfectly legal for an adult to enjoy their favorite beer on a hot summer day, it’s important to keep things under control.

    If a homeowner allows heavy drinking at their gathering, and a problem arises, they can be held legally responsible. Provide water, and other non-alcoholic beverages and encourage guests to stay or get a designated driver if they have been drinking.

    Watch the Weather

    A sudden thunderstorm, heavy rain, or gusts of wind could send everyone scrambling for cover in the middle of a perfectly cooked outdoor meal. No one can control the weather, but they can certainly plan for it. If there’s even a small chance of rain, consider providing indoor accommodations for guests.

    For example, pull the car out of the garage, and set up some tables and chairs inside. When renting a canopy or another outdoor shelter, make sure it gets adequately secured and has protective panels to keep out the rain.

    Clean-Up Immediately

    Keeping the outdoor entertainment area clean is incredibly important. Provide ample trash cans for guest’s paper plates, cups, and plastic cutlery. Walk around, visit with the guests and pick up and throw away any discarded trash.

    As soon as the party is over, stack the chairs, fold up the tables, dismantle the canopy and clean the area. Don’t let it sit until morning. The neighbors will appreciate it, and it keeps that new home and yard looking great.


    Buying a home for the first time is a thrilling experience, and it’s perfectly understandable to want to share it with everyone. An outdoor gathering is a perfect way to do it, and it’s a lot of fun as well. If things don’t get handled properly, however, it can cause a rift in the neighborhood.

    It doesn’t take a significant amount of effort to be a considerate, thoughtful neighbor. Communicate the plans, and let the neighbors know they’re welcome to stop by. During the party, pay close attention to the way guests behave and keep everything clean and orderly.

  • Jora Composter vs Heap Method [Review]

    Jora Composter vs Heap Method [Review]

    Jora composter versus a compost pile


    Composting is an activity that a lot of home gardeners consider taking on but get overwhelmed once they start. After all, it’s just throwing kitchen scraps in a bin and then magically this great organic fertilizer appears. If you’re one of the thousands who has tried to start a composting project, you know that it is not that easy.

    I’ve been composting for nearly a decade and I’ve made a lot of mistakes. This all changed after I purchased a Jora composter in 2017. The JK270 model has changed my composting regimen completely.

    Learn from my experience over the past five years and make sure that your home composting program is effective from the beginning.

    Composting Methods

    yard waste
    Turn your yard and garden waste into valuable planting material with a composter.

    There are two ways to go about composting at home – you can either create a compost heap or use a compost tumbler. As I said earlier, I’ve been composting for almost ten years so I’ve experimented with both methods. Let’s review each option.

    The Compost Heap Method

    start of composting food wasteThis is as simple as it comes. You simply layer browns (e.g. leaves, hay or bread) with greens (e.g. grass clippings and kitchen scraps) and then cover with a layer of topsoil and water. As you accumulate more material simply add layers to your existing compost heap. While this is certainly an uncomplicated approach and extremely easy on the pocketbook, you will most certainly face unwanted animal visitors and the need to aerate the heap.

    While a pile is easy to build, it isn’t easy to aerate. Aerating is periodically mixing the organic material together to allow the microbes the chance to start decomposing the ingredients.

    If you don’t aerate, the inside of your pile will compost but the outer sections will just turn dry.

    Compost Tumblers

    This is a much more efficient and pleasant-smelling option. A tumbler is a composting bin that is completely enclosed which can be rotated so that the materials mix easily. Also the fact that it is enclosed means that the heat generated from the composting process stays within the tumbler and gets you to your end result faster.

    My Path to the Joraform JK270

    pallet compost bin
    My heap compost bin made from old pallets.

    In my initial attempts at composting, I went full steam into the heap method. I placed a three-sided bin in a corner of the backyard and began to populate my layers with leftover meat and fish, yard clippings, and coffee grounds. For months I labored and even completed a full turn but really had nothing to show for it at the end. My wife was also not pleased with the contribution it made to our overall backyard appearance.

    Notice the complete dryness and lack of any results due to not turning the pile.

    I began to research other options which led me to purchase my Jora JK270 compost tumbler. While Joraform offers a few different sizes of tumblers, I chose the 70-gallon option which equates to about 9.5 cubic feet. This size falls roughly in the middle and was the perfect size considering the amount of compost that I wanted to generate.

    Pros of the Jora Tumbler

    One of the biggest benefits of this particular model of Jora compost tumbler is its dual chamber design. This allows you to keep adding materials to one compost bin while the other bin is maturing so you can have quality compost at regular intervals. This is a huge benefit over other composters with just a single bin.

    These dual composters will easily compost traditional materials but the higher temperatures also allow it to break down previously non-compostable waste such as fish waste or cooked meats. So go ahead and grab those green and brown materials.  Green materials include items such as fruit and vegetable peelings, kitchen scraps, green garden debris and grass clippings. Brown materials are items such as eggshells, hedge clippings, hay, newspapers and wood shavings.  There are still some items that you cannot compost which include glossy magazines, diseased plants and coal ash.

    Other pros to the Jora are the fact that it is made of high-quality galvanized steel. The sealed bins are perfect for keeping out mice and other rodents so you don’t have to worry about tossing those food scraps into the composter.

    Also, the rotation mechanism is easy to use even when the bin is full as it has multiple handles on the tumbler. Even my kids like opening it up to drop a few weeds in and then spinning it like the big wheel on the Price is Right.

    The design also includes several aeration holes on the sides to allow in oxygen while you’re tumbling. And as my wife is quick to point out, it’s also much more attractive than the huge pile of material that I had accumulated using the heap method.

    And while it is not as important given that I live in the South, the enclosed bins are insulated and allow for year-round composting.

    Cons and Drawbacks of the JK270

    There are some cons to the Jora JK270 composter not the least of which is the installation itself. I eventually had to enlist a friend to help me so I would safely say that this would be a two-person job for just about anyone. The company has a very thorough and useful video which I highly recommend.

    One other negative is the difficulty of removing the compost once it is complete. I find it rather awkward and often leave some on the ground. A large plastic tub will work better than the 5-gallon bucket I use, I just can’t seem to find one when I need compost for planting.

    Here are some actual photos of my JK270. It’s a composting bin so it can definitely get messy.

    For the aspiring urban gardener, composting is a great option to ensure you have a steady stream of organic fertilizer with the added benefit of landfill diversion. If you’re just getting started the heap method may be best for you. Start-up costs are virtually nil so you could start tomorrow if you wanted. The turnaround time to get your compost though is going to be extremely slow.

    If you have any desire to really embrace composting I highly recommend the Jora JK270. I’ve had mine for years and it’s still producing great quality compost. I bought my composter on Amazon (click here to check the current price of the Jora composter).

    Joraform 270JK Compost Tumbler
    This image links to Amazon.com

    Buy on Amazon

    I think the models from Joraform are the best composters on the market currently. The dual bins, high-quality construction, and well-designed tumbling process allow you to get what you want, beautiful dark compost, faster than other methods.

    If you have any question just drop them in the comments and I’ll do my best to follow up with you.

    Pinterest Image:
    Jora JK270 composter review

  • Homemade Orchid Fertilizer: How to Make Your Own

    Homemade Orchid Fertilizer: How to Make Your Own

    diy fertilizer for orchids


    The Orchid is one of the most popular indoor plants that we have around. Despite the fact that the exotic flower is readily available at all the home and gardening stores, not many people understand how to properly care for the plant.

    If you just got your orchid and are wondering how you will take good care of it, here are a few things that you need to know about different aspects such as watering, pruning and most importantly, how to make your own DIY homemade orchid fertilizer.

    Purple Orchid Blooms
    Orchids are one of nature’s most beautiful flowers. You can keep yours healthy by making your own homemade orchid plant food.

    Understanding how to care for your orchids

    There are many things that go into the process of caring for orchids. Understanding these care tips is what will prevent you from coming home to find a dead or dried up plant. Also, when the orchid is cared for as it should be, you get longer lasting blooms.

    Watering your orchid

    red orchid bloomsMany people assume that because orchids are tropical plants, they need a lot of water so that they can properly bloom. They end up watering the plant several times in a week and at times, even daily.

    The worst thing about this frequent watering is that it starts rotting the roots and eventually, the plant dies out. The reality is that orchids require less water than you might think..

    If you have it as an indoor plant, you should only water it once every five to twelve days, depending on the particular type of orchid that you have and the humidity level of your home.

    This is a general rule, and the prevailing temperature and humidity conditions will also play a role in determining the amount of water. If it is an outdoor plant and a lot of evaporation is taking place, consider watering it a little more often.

    How to water according to variety

    There is a number of orchid varieties in the market. Not all of them need the same amount of moisture when they are growing:

    • If you have Paphiopedilum, Cymbidium, Odontoglossum, or Miltonia Orchids, make sure that you keep them relatively dry at all times.
    • If you have Cattleya, Brassia, Dendrobium or Oncidium, keep them wet during the periods of active growth and allow them to dry in between.
    • Phalaenopsis, Ascocenda, and Vanda should only be watered when the weather is hot and dry and allowed to stay dry when the weather is humid.

    The shops that sell the plants are always willing to help if you get stuck figuring out the name and species of your orchid.

    When the orchid refuses to bloom

    There are many reasons behind orchids failing to bloom as they should. The state of the orchid is usually the first indicator as to whether it is blooming well or not. If the plant you have is healthy with thick green leaves, and there are no droopy or brown leaves, you can just cut the orchid on the node and expect it to send a bloom to that location within a few days.

    However, if the leaves have started withering, you may be dealing with either a sick plant or poorly nourished plant. In case the plant has not been receiving all the nutrients that it should, you will need to assess the fertilizer type that you have been using and adjust it accordingly.


    Homemade orchid fertilizer recipes

    Not all fertilizers are created equally. An all-purpose home-made orchid fertilizer should have a number of ingredients that will help you get all the nutrients that you plant needs.

    The most essential of these ingredients include:

    • Milk
    • Eggshells
    • Crushed chicken bones
    • Molasses
    • Potatoes
    • Water that rice has been boiled in

    These ingredients are great because they provide the plant with a number of nutrients that are basic for them to thrive. Some of these nutrients include nitrogen which helps foliage, shoot and stem growth. The second is phosphorus which ensures that your orchids root system is growing well. The third is potassium which helps the orchid to flower.

    Each of the plant food ingredients, therefore, has a role that it plays in the provision of these nutrients.

    For instance, milk contains Nitrogen, Potassium, and Calcium and also traces of Magnesium. You can create a DIY orchid fertilizer by simply mixing a quart of milk with a gallon of water (or any 1:4 ratio) and using it to water the orchids weekly.

    Tea, on the other hand, contains Nitrogen. To make this into a fertilizing ingredient, you just need to open a tea bag and pour out its contents onto the pot containing the plant.

    Why you need high nitrogen levels in orchid fertilizers

    The most important thing to note about orchids and the process of making Nitrogen fertilizers for them is that for the fertilizer to be effective, it will need a higher than regular nitrogen level. This is because the potting is usually made of tree bark.

    This bark contains bacteria which consume some of the nitrogen which will be in your fertilizer. When you give a higher concentration of Nitrogen fertilizer to your plant, you are ensuring that regardless of the amount the bacteria take up, your plant still gets enough nutrients.


    Potatoes

    Potatoes are an excellent diy fertilizer.Potatoes, on the other hand, have a very high concentration of potassium and also traces of phosphorus. You can make this fertilizer by simply boiling potatoes and peeling off the skin.

    Soak, chop the potatoes and then add some banana leaves and sugar to the mixture. This is the mixture that you will add to the pot and use as a source of potassium and phosphorus for your orchid.

    Note that the levels of potassium that your orchid is receiving will determine how well it blooms.


    Molasses fertilizer

    Molasses in fertilizers provide energy to your plants.This one is really simple. You just need to take a teaspoon of molasses and add to water and then make it part of your daily orchid watering routine.

    When combined with the other homemade fertilizer types, it gives your orchid all the nutrition that it needs to grow.


    Crushed and dried chicken bones

    Chicken bones are a great source of calcium, which is used by orchids for maintaining their structure.Chicken bones are very rich in potassium and calcium. You just need to dry the bones and then crush them and after that, add them to the pot that contains the flower.

    When the orchid takes up the calcium, it will look healthy and stronger.

    Eggshells as an alternative way to fertilize

    The other alternative which offers calcium to the orchid is eggshells. You need to save your eggshells after you have cooked the eggs.

    Crush them into tiny pieces and then use a mortar and pestle to grind into a fine powder which you can add to the plant.


    Epsom salts

    Epsom Salt can be used to fertlize orchids.Epsom salts contain a number of minerals with the most prominent being magnesium.

    You can get your orchids all the magnesium they need from adding a teaspoonful of these nutrients every now and then.


    Rice water

    rice waterRegarding the rice water, you just need to take some water that rice has been boiled in and allow it to cool.

    Use this on your orchids often to get nutrients such as niacin, thiamine, riboflavin and folic acid to your orchid.


    Precautions to take when making Orchid fertilizers

    These fertilizers are a quick serve solution which makes it possible to offer all the nutrients that your orchid needs with ingredients which can easily be found in the home.

    However, there is a risk that using homemade fertilizer comes with, over-fertilizing your orchids. In order to avoid this mistake, you have to keep watching your plant for signs that it might have been over-fertilized.

    Some of the common indicators of the problem include:

    • The flower develops whitish crusting on the potting medium.
    • When the roots start turning black.
    • The leaves start drying up and turning brownish at the tips.

    It is, however, important to note that even with all these signs present, it is still a little tough to determine whether your plant is really getting more fertilizer than it should.

    The essential thing is to watch the plant carefully. In case the plant develops signs of poor reaction to the fertilizers, try and reduce the amount.

    The other option that you have is to buy commercial fertilizers. Before using one, check out the nutrients on the NPK scale and take the one whose ratio corresponds to the needs of your orchids.

    Using compost on your orchids

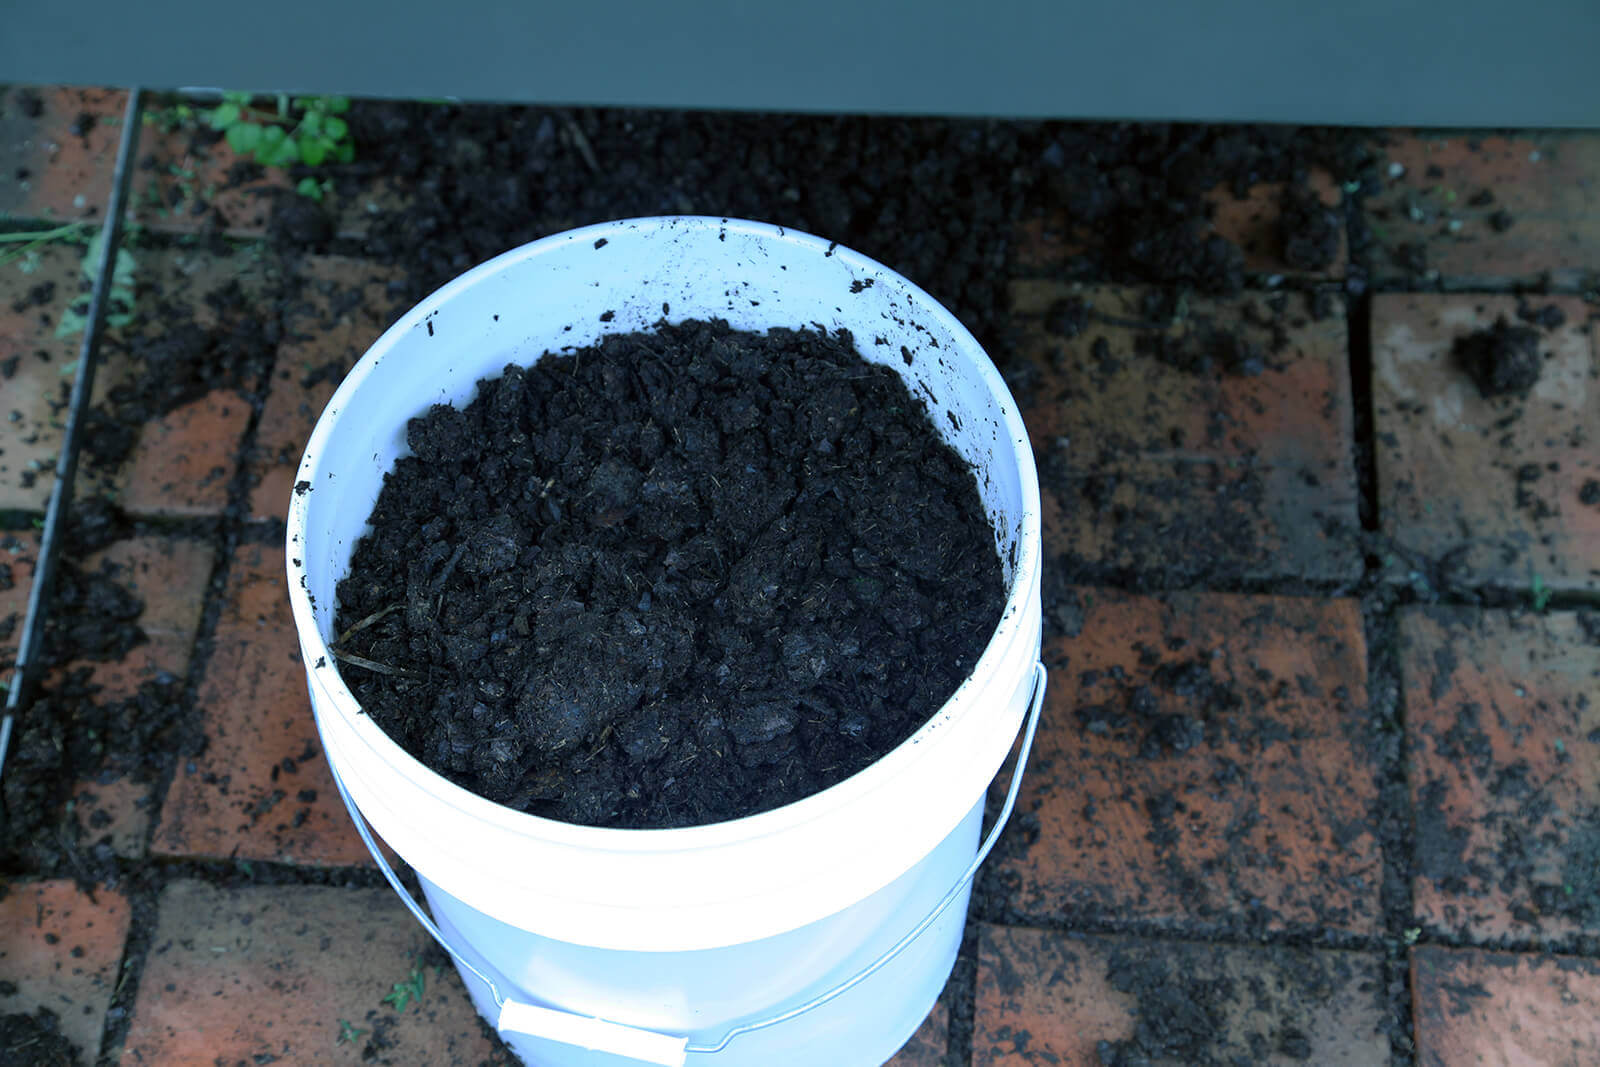
    bucket of compost Bucketful of my homemade compost.Another fertilizer option that is available is compost.

    It is safe to use as long as it is fully composted (not hot compost). But generally, it does not contain all the ingredients that you would want in an enriching orchid fertilizer.

    It is, therefore, best to add a few of these homemade alternatives, even when you are using the compost.

    Final Thoughts

    Making and using a homemade orchid fertilizer will help your plants stay healthy,Finally, it is important to note that while these “common ingredient” homemade fertilizers may seem extremely easy to create, it is really hard to make fertilizer that has perfect NPK levels at home.

    Keep mixing up these orchid fertilizers with commercial alternatives as this is the best way to make sure that your orchids are getting all the nutrients that they need.

    Most importantly, keep checking the status of the plant and whether it is blooming as it should. This is usually the first indication that something may have gone wrong while creating your homemade fertilizers.


    Pinterest Image
    Make your own orchid fertilizer at home.