
Category: Reviews

  • Best Stump Killer – Get Rid of an Unsightly Tree Stump

    Best Stump Killer – Get Rid of an Unsightly Tree Stump

    sprout growing from tree stump
    Image © Deposit Photos

    Does that tree stump in your yard refuse to rot away? Does it keep sprouting new shoots?

    If the answer to either of these questions is yes and you’re tired of looking at it, the best stump killer available will help solve your problem in a matter of weeks.

    Dow AgroSciences RTU548 Tordon RTU Herbicide is the best stump killer on the market for most needs. It’s not only highly effective in killing tree stumps, but it’s also reasonably simple to use. Only a few products on the market can compete with RTU548’s effectiveness.

    In this article, I’ll talk you through some of the most popular stump-killing products on the market today. Then, to help you decide the right stump killer for your needs, read on as I go through these chemicals and discuss their pros and cons.

    What To Consider When Buying a Stump Killer

    Your choice of a stump killer product will highly depend on your needs and circumstances.

    For example, getting a stump killer or a stump remover is one of the first things to consider.

    While the former is a more potent option, the latter’s design aims to kill the root system of tree stumps, brushes, and other woody vegetation.

    Another thing to keep in mind is safety. Some products can be highly toxic, both environmentally and when applying them. In addition, reading up on how easy to use specific products should be one of your priorities.

    Here are the things you should take into consideration when buying a stump killer:

    • Whether you need a stump killer or stump remover
    • Location (whether the application site is near maintained vegetation such as lawns)
    • Type of stump you’re looking to remove (wood or a woody plant)
    • Environmental and personal safety
    • Ease of use
    • The time it takes for the product to work

    How We Chose the Best Tree Stump Killer

    All of the factors listed in the previous section were considered when choosing the best tree stump killer products.

    In addition, online reviews and experts’ opinions were a significant contributing factor to the final list order.

    While time-consuming, this process ensures that the list of the best stump killers and removers you’ll find below is as factual and objective as possible.

    Best Stump Killers on the Market

    Deciding which stump killer to go for can quickly get overwhelming.

    Let’s explore further what makes each of these stump killer beasts at removing ugly stumps from your property. All recommendations are found on Amazon.

    Dow AgroSciences Tordon RTU Herbicide

    Possibly the most potent stump killer available, Dow AgroSciences Tordon, is a concoction designed to kill stumps of more than 20 woody species.

    Tordon RTU Herbicide’s applications list includes, but isn’t limited to, forested and non-crop areas (fence rows, roadsides, yards, etc.). Remember that, due to its strength, this stump killer shouldn’t get in touch with any grass or plants you wish to keep alive.

    A ready-to-use product, Tordon RTU Herbicide, is relatively simple to use. The stump killer can be applied using the injection method. However, spraying or painting the product onto the top of the stump and along the bark line is the way to go if you want the stump dead.

    Renowned for its effectiveness, Tordon should kill any stump in 7-14 days. If there are no results in 10 days, reapplying the herbicide is necessary.

    Pros

    • Ready to use straight out of the bottle.
      There’s no mixing and thinking about ratios involved with Tordon RTU Herbicide.
    • Easy to apply.
      The herbicide contains a blue dye that helps keep track of the application process, especially with multiple stumps. Tordon RTU can be applied using various methods.
    • Usable throughout the year.
      Tordon RTU’s formulation uses the no-freeze technology that keeps it liquid even in the harshest winter conditions.
    • Fastest stump killer available.
      Tordon kills tree stumps in 1-2 weeks, making it the most efficient stump killer you can buy.
    • Effective against most wood species.
      This stump killer is guaranteed to stop over 20 wood species in their tracks.

    Cons

    • Highly toxic.
      Using protective equipment such as safety glasses and gloves is always a must with Tordon. Covering the treated area after the Tordon application is also advised.
    • Not recommended for residential and commercial lawns.
      Due to its toxicity, Dow AgroSciences doesn’t recommend using Tordon on lawns.


    VPG Fertilome Brush Stump Killer

    For those after a less potent stump killer, VPG Fertilome Brush Stump Killer might be the next best choice:

    While initially designed for invasive species root elimination, Fertilome Brush Stump Killer is also an excellent product for getting rid of unwanted vines, ivies, and other woody plants.

    Accelerating the decomposition process of stumps is another one of this product’s uses.

    One of the most significant benefits of this stump killer is that you can dilute it with water–a handy feature when dealing with vines, ivies, brushes, and smaller stumps. Fertilome should be applied to stumps using a paintbrush to avoid damaging nearby vegetation.

    Fertilome takes 1-6 weeks to kill the plant’s root system. After that, it’ll take up to a couple of months for the stump to rot enough to be easily removed from the ground. Another thing to consider is that this product is much more effective on freshly cut stumps.

    Pros

    • Effective against invasive plants.
      Fertilome’s most significant advantage is that it’s highly effective against invasive species. This is why we commonly use it around homes and cabins.
    • It can be diluted for smaller projects.
      For example, Fertilome shouldn’t be cut with water when used for stump killing. However, you can use smaller amounts of the chemical for killing ivies, vines, and similar woody plants.

    Cons

    • Only usable for stumps up to 6 inches (15cm) in diameter.
      Unfortunately, this stump killer is not as effective on wider stumps as vines and smaller stumps.
    • Less effective on older stumps.
      Using Fertilome on older stumps significantly impedes its effectiveness. Make sure to use the product on freshly cut stumps.
    • Best used with a stump remover.
      Considering its brush-killing original intention, Fertilome shows the best results when combined with one of the stump remover products.


    Bonide Stump-Out Stump Remover

    If you have an older stump that needs removing, Bonide Stump-Out is the product for you.

    While ineffective on fresh tree stumps, Bonide’s Stump-Out stump remover is perfect for stumps that have been seasoning and ruining your yard’s appearance for over a year. Perfectly safe for residential and commercial lawn use, this product comes with the highest recommendations and praises.

    Bonide Stump-Out is unlike most other stump killers available. This stump remover comes in granules.

    The application process is pretty simple. All you need to do is drill four holes into the top of the stump, fill them with Stump-Out, and add hot water to activate the chemical.

    With this Bonide stump remover, you’ll need to wait 4-6 weeks for the stump to die. After that, the stump can be removed using your method of choice.

    Pros

    • Non-toxic.
      Unlike most stump killers on the market, Bonide Stump-Out doesn’t contain potassium nitrate but instead uses sodium metabisulfite as the main ingredient. This is what makes the chemical’s application far less dangerous.
    • Safe to use near grass and plants.
      Note that Bonide Stump-Out’s label marks it as a stump remover instead of a stump killer. This means that the product is far less toxic than some competitors, making it safe to use near vegetation.
    • Easy to apply.
      The change in chemical composition means that Bonide Stump-Out comes in a granulated form instead of liquid, making it easier and safer to use.

    Cons

    • Requires the use of a brush killer product.
      While excellent for speeding up the stump’s decomposition process, Stump-Out won’t do much on its own.
    • Not suitable for killing fresh stumps.
      Bonide Stump-Out only works on tree stumps that have been allowed 12-18 months of seasoning time.
    • It only works on some wood species.
      This stump killer is best-suited for species that don’t sprout after being cut down. The list includes oaks, fir, cedar, maples, pines, and aspens.


    Spectracide Stump Remover

    Another remover product, Spectracide Stump Remover, is designed to be used as an addition to a brush killer product of your choosing.

    This remover is an excellent option for stumps whose root system has already been dealt with using other products. However, as the manufacturer claims, using Spectracide Stump Remover with freshly cut stumps shows the best results.

    The application process of this product is simple. All it takes is drilling 4-5 holes at the top of the stump and adding the HG-66420 granules. Just like the previous product on the list, hot water is what activates the granules.

    Spectracide Stump Remover’s effects on the stump should be noticeable in 6-8 weeks. Once this period has passed and the stump has rotted away, it can be mechanically removed or burned.

    Pros

    • Suitable for home use.
      Due to its non-toxic characteristics, Spectracide Stump Remover is safe to use on lawns and near other plants.
    • Speeds up stump decomposition with freshly cut stumps.
      Even though it cannot kill the roots of a tree stump on its own, this product will certainly aid the fresh stumps’ decay process.
    • Money-back guarantee.
      Spectracide offers a money-back option in case their Stump Remover fails to do what the label promises.

    Cons

    • Requires prior brush killer application.
      Spectracide Stump Remover isn’t a stand-alone product, as it requires the application of a brush killer to work its magic and decompose the tree stump.
    • Long stump decomposition period.
      Compared to some of the leading products in the business, Spectracide Stump Remover takes a relatively long time to decompose the tree stumps.


    Stump Stop Cut Stump and Basal Bark Treatment

    Another great stump-killing product, the Stump Stop, is one of the most sold stump killers you can get your hands on online.

    Stump Stop is effective against close to 100 different kinds of wood and woody plants. If that isn’t enough, this herbicide also kills ivy and poison oak.

    This stump killer’s primary purpose is the use in forests, fence rows, wildlife openings, around farm buildings, non-irrigation ditch banks, and various other spots. Stump Stop is a product that can meet all your stump-killing needs.

    Easy to use, the product requires no mixing. However, the application method slightly differs from other stump killers. The undiluted product application should go around the edge of the entire stump, with no drilling required. Painting the chemical on the sides of the stumps is also needed.

    Caution while using Stump Stop is advised, as the chemicals found inside can cause skin irritation. Another thing I’d suggest is covering the treated stump with some protective material to prevent children and animals from touching the area.

    Stump Stop can take up to 6 months to kill the tree, while it takes an extra few months for the stump to decompose enough for removal to be possible.

    Pros

    • No mixing is required.
      Stump Stop will arrive ready to use, with no special mixing or dilution process required.
    • Effective against 100 wood species.
      Sumac, willow, alder, birch, elm, and more than 90 other types of woody plants are no obstacles for Stump Stop.
    • Able to kill invasive species.
      In addition to killing unsightly tree stumps, Stump Stop is also effective against invasive species such as poison oak and ivy.

    Cons

    • Safety issues.
      Just like any other potent herbicide, Stump Stop can be toxic to humans and animals. Using protective gear is advised.
    • It takes a long time to work.
      While highly effective, Stump Stop isn’t the quickest stump killer on the market. Sometimes it can take almost a year to decompose the tree stump to the level it can be excavated.


    Other Tree Stump Removal Methods

    Although effective, stump killers are notoriously toxic to the entire application area and their surroundings. Therefore, these products also require special attention and some basic safety measures until they’ve done their job.

    Suppose you’re after a different take-out method for the stump on your property. In that case, you’ll find the list of available options you can take into consideration below.

    However, before diving into the list, an important thing to note is that, even after applying a tree stump killer, you’ll still need to get rid of the rotten stump. Most of the time, all it takes is just a shovel and a bag. Sometimes, however, one of the methods listed will be necessary.

    Rent or Hire a Stump Grinder
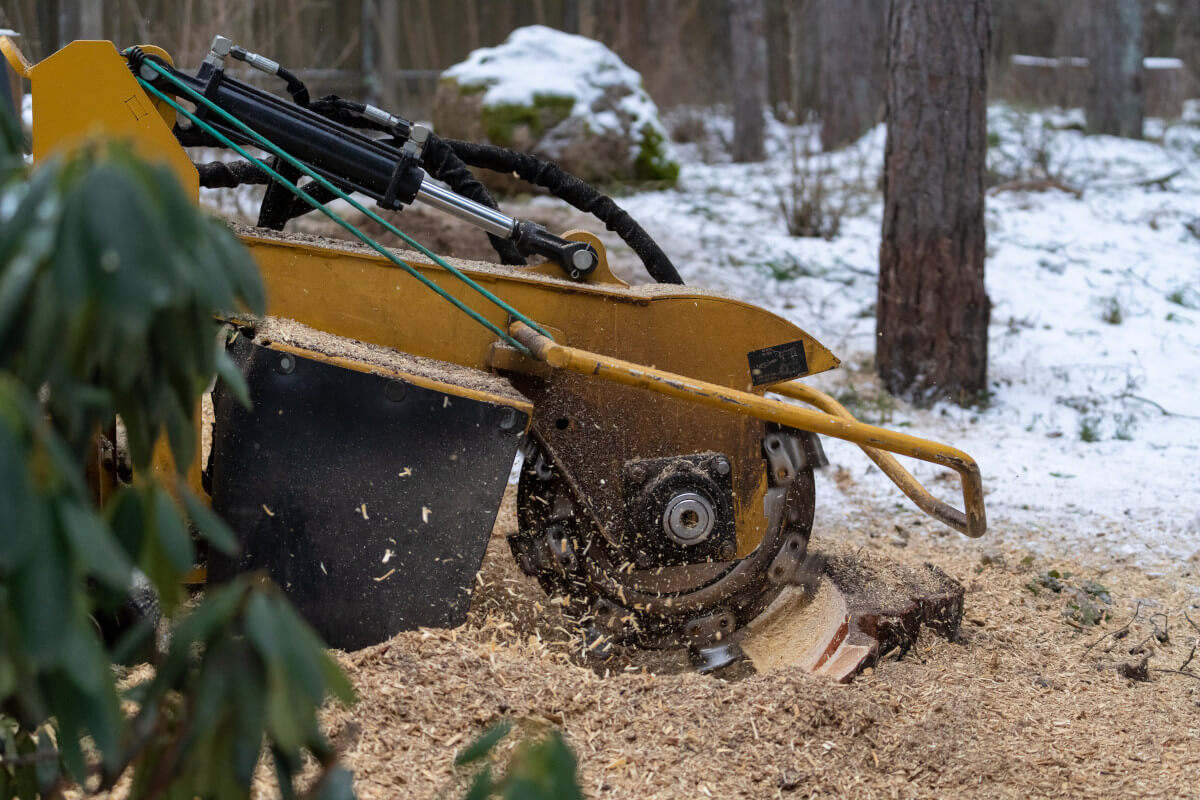
    stump grinder actively grinding down a tree stump in the snow
    Image © Deposit Photos

    Digging out the live stump is commonly the first thing that comes to mind when considering tree stump removal methods. However, for this job, you’ll need some specialized machinery.

    There’s no better tool for the job than renting a stump grinder. While labor-intensive, this method of stump removal doesn’t involve any chemicals. However, keep in mind that they are much more expensive than buying a bottle of stump killer.

    You can rent a stump grinder for an average of $270 per day. Keep in mind that the price can vary from $90-$440 per day, depending on where you are in the county.

    Burn Out the Stump
    Burning out the stump is one of the cheapest and most popular trump removal techniques.

    Here’s how you can do it safely:

    1. Clear any leaves, grass, and other flammable materials around the stump.
    2. Drill as many holes as you can through the top and sides of the stump.
    3. Fill the drilled gaps with diesel fuel.
    4. Let the fuel soak into the stump.
    5. Cover the stump with dry scrap wood and set it on fire.
    6. Keep a watchful eye until the stump burns out.
    7. Remove the stump remains, as well as the remaining roots.
    8. Fill the hole with fresh soil.

    Using burning as the final step in getting rid of the stumps that have been treated with a stump killer is a widespread stump removal method.

    Copper Nails
    Hammering copper nails into the stump can kill most tree stumps. However, the nails need to be placed at an angle and as close to the ground as possible.

    Once hammered, you should cover the copper nails with soil. The oxidation process from the copper should kill the stump and enable its easier removal from the ground.

    The process of oxidation can take anywhere from three weeks to a few months. Once the tree’s nutrient supply system is dead, it can take a few extra months for the stump to show visible signs of decomposition.

    Expect to spend over a year waiting for the tree’s remains to decay naturally enough to dig them out.

    Other DIY Tree Stump Killer Methods

    If you find that none of the methods listed above are for you, there might be a different solution. For example, drilling holes in the tree stump and filling them with various everyday household items might be the right thing for you.

    Here are some DIY tree stump killer methods you can try before resorting to the good old chemicals:

    • Adding rock and/or Epsom salt to the tree stump and watering the holes for a few days.
    • Filling the holes with bleach for four days and allowing the time for the stump to die.
    • Apply diesel fuel to the pre-drilled holes.

    Depending on the size and wood species of the stump in question, these methods are more or less effective.

    However, remember that none of them are as safe or effective as using a proper tree stump killer.

    FAQs

    How Long Does It Take for a Tree Stump To Rot Naturally?
    It takes at least three to ten years for a tree stump to rot naturally, depending on the species and size of the tree. Teak, black locust, and California locust are just some of the woods that take the longest time to rot completely.

    Using a stump killer is much more time-efficient than letting nature take its course.

    How Long Does It Take To Kill a Tree Stump With Chemicals?
    Depending on the type of chemicals used, it typically takes two to four weeks to kill a tree stump. However, some stump-killing chemicals’ effects can be seen after just 7 days.

    On the other hand, Stump removers can take up to a full year to show noticeable results.

    Killing a tree stump is the fastest way to get rid of this unwanted garden ornament.

    How Do You Use Tree Stump Killer?
    Here’s how to use tree stump killers:

    1. Drill a few two-inch (5.08 cm) holes in the stump’s surface.
    2. Add the stump killer based on the amount specified on the packaging.
    3. Cover the stump to keep curious children and pets safe.
    4. Check on the stump periodically.
    5. Dig the stump out once it gets soft and spongy.

    Keep in mind that this is a general guide on applying stump killers. Every product will come with its own application guide and requirements printed on the label.

    What Chemicals Are in Tree Stump Killer?
    Some of the most common chemicals in stump killers include glyphosate, triclopyr, picloram, and potassium nitrate. While all of these contribute to the product’s overall effectiveness, potassium nitrate is what kills the stump. The other ingredients are there to prevent future growth.

    Will My Tree Stump Killer Hurt the Grass or Plants Near the Stump?
    Most of the herbicides found in stump killers will hurt and kill grass and plants near the stump. For this reason, applying stump killers with caution is advised.

    Even though glyphosate and triclopyr are viewed as slightly toxic, these chemicals become a potent toxin when mixed.

    Potassium nitrate found in stump removers, on the other hand, isn’t dangerous for your garden vegetation.

    How Long Until the Tree Stump Killer Is Rain Safe?
    A tree stump killer is generally rain safe within around four hours to a day. But, ideally, they should never be exposed to rain as water increases their soil mobility and breaks down periods.

    This is another reason why your stump needs to be covered after applying tree stump killers.

    Can I Use the Stump As Firewood After Applying Stump Killer?
    You shouldn’t use the stump as firewood after applying a stump killer because of health and safety concerns. Burning the affected stump in an indoor stove is unsafe for humans and the environment. Also, remember that the herbicides that killed the stump are highly toxic when combined.

    Summary of the Best Stump Killers and Removers

    Before concluding this article, here’s a table of comparisons for the best stump killers mentioned in the article:

    Product NameBest Used ForTime it Takes to Work
    Dow AgroSciences TordonKilling and decomposing all types of wood stumps.7-14 days
    VGA FertilomeKilling brushes, vines, ivies, and other woody plants.1-6 weeks
    Bonide Stump-OutAiding the seasoned tree stumps’ decomposition.4-6 weeks
    Spectracide Stump RemoverAiding the freshly cut tree stumps’ decomposition.6-8 weeks
    Stump StopKilling and decomposing all types of wood stumps.6-12 months

    You might be looking for the most potent stump killer available for sale or a milder version that’ll help remove the ugly tree stump from your yard. Whatever the reason behind your search, the perfect product for your needs is somewhere on the list above.

    Final Thoughts

    When it comes to killing the root system of your unsightly tree stump, VPG Fertilome Brush Stump Killer is the way to go.

    With dead roots, stump removers such as Bonide Stump-Out and Spectracide Stump Remover are both excellent ways to speed up the rotting process before you can proceed to stump removal.

    However, if you’re after the best stump killer and an all-in-one product, Dow AgroSciences Tordon RTU Herbicide should be the first one you should check out. Its effectiveness and strength are matched by just a few other products on the market.

  • Best Garage Chest Freezers (2022 Reviews)

    Best Garage Chest Freezers (2022 Reviews)

    woman getting food out of a stock chest freezerWhen it comes to finding the best chest freezer for your garage, there are a few things you need to keep in mind.

    First of all, what size do you need? Do you have enough space in your garage for this appliance? How much power will be needed for the freezer to run properly? What kind of warranty is included with this product?

    These questions and more can help narrow down which chest freezer is going to work best for your needs!

    To aid you in your search for a garage freezer, we’ve whittled it down to the top three models that work best for specific needs.

    To help our readers find their perfect match when shopping around for a new garage freezer, we have honed in on the best picks out there based on what they’re looking to use theirs for and picked them apart by size so picking one is easier than ever before!

    Best Garage ReadyBest for Mild ClimatesBest Mini Freezer
    GE garage ready chest freezerFrigidaire 14.8 cu ft chest freezerMidea 3.5 cu. ft. freezer
    GE FCM16DLWWFrigidaire FFCL1542AWMidea MRC04M3AWWW

    View at Home Depot

    View at Home Depot

    Buy on Amazon

    • 15.7 cu ft
    • 4 storage baskets
    • Temperature alarm
    • 14.8 cu ft
    • External power light
    • Exterior temp controls
    • 3.5 cu ft
    • Efficient D+ System
    • Hinged door stays open

    The Best Garage Chest Freezers

    Chest freezers are versatile and come in a variety of sizes for all storage needs. Whether you just need one to store your summertime barbecue meal or enough freezer space for the meat needed when hosting Thanksgiving dinner, there’s an option that won’t disappoint.

    Here is our list of top three chest freezers with detailed information about each model:

    GE FCM16DLWW – (Best Garage Ready)

    GE garage ready chest freezer
    This image links to Home Depot

    Our top pick for a garage-ready unit is the GE 15.7 cubic feet chest freezer. It comes with a manual defrost drain which means that it is not a hassle to clean up after.

    The GE 15.7 cubic feet freezer also includes an interior light, moisture-proof gasket and easy glide shelving, all of which make for the perfect chest freezer!

    This freezer is perfect for those who live in a colder climate. It has been tested and will perform in temperatures from 0° – 110° F!

    View at Home Depot

    Features for the GE

    • Garage Ready
    • Temperature warning alarm
    • LED interior lighting
    • Built-in lock w/key
    • Adjustable temperature control
    • Four sliding baskets offer easy access
    • Exterior power on light
    • Defrost water drain
    • Clean-looking recessed handles

    What can’t you put in this chest freezer? A 15.7 cubic feet GE Chest Freezer offers optimal storage capacity for your frozen items with the convenience of an easy access door that locks to keep children out.

    This Garage Ready freezer features 4 lift-out sliding bulk storage baskets so when defrosting, it is effortless and efficient because water drains right into its exterior drain plug!

    Specifications

    • 15.7 cubic feet capacity
    • Temp. Range: -10° to +15° F
    • Shipping Weight: 168 lbs.
    • 33 3/8″ H x 65″ W x 28 1/2″ D
    • Height with lid open 90°: 60 5/8″
    • kWh/year: 277


    Frigidaire FFCL1542AW – (Best for Temperate Zones)

    Frigidaire 14.8 cu ft chest freezer
    This image links to Home Depot

    The Frigidaire 14.8 cu. ft Chest Freezer is the perfect solution for storing all your frozen foods with a spacious interior that can hold all the frozen food you can throw at it! Take organization to the next level by using our heavy-duty sliding plastic baskets, so you’ll find what you’re looking for quickly and easily – whether it’s vegetables or ice cream!

    The exterior dial temperature control makes operating this freezer easy and convenient no matter where you are inside your kitchen; simply set at whatever temperature feels right depending on how long before eating time, then keep cool until ready. Sleek white finish complemented by smooth steel means always having an organized refrigerator/freezer area without sacrificing looks thanks to its clean modern look.

    View at Home Depot

    Features for the Frigidaire

    • 14.8 cubic feet capacity
    • Exterior temperature control
    • Defrost water drain to ease defrosting
    • LED lighting
    • Optional casters for movability
    • Safety lock with auto-ejecting key
    • Sliding baskets allows accessible organization
    • Perfect for garages in temperate climates

    The Frigidaire 14.8 cu. ft. Chest Freezer is perfect for any foodie who needs to store frozen foods. With its heavy-duty sliding plastic baskets you’ll never lose track of what’s in the back and it offers an exterior dial control that makes temperature adjustment quick, easy, and efficient!

    White with a sleek steel exterior; this freezer will look great anywhere while also being nicer on your housekeeping skills when grime builds up over time. We all know that white shows dirt less than black or grey does.

    Specifications

    • 14.8 cubic feet capacity
    • Shipping Weight: 152 lbs.
    • Temp. Range: -10° to 10° F
    • 32 1/2″ H x 55 3/4″ W x 29 9/16″ D
    • Height with lid open 90°: 59 7/8″
    • kWh/year: 306


    Midea MRC04M3AWWW – (Best Mini)

    Midea 3.5 cu. ft. freezer
    This image links to Amazon

    The Midea MRC04M3AWW 3.5 cu. ft. chest freezer is an excellent choice for storing your favorite meat and ice-cream foods. A built-in door hinge allows you to take or put food into the fridge with two hands rather than using one hand to prop it open.

    Plus, due to how much more efficient and strong cooling this product offers from their D+ system, all of your frozen goods will be kept at optimum temperatures without having any chance of melting!

    Buy on Amazon

    Features for the Midea

    • Midea D+ cooling system
    • Adjustable thermostat
    • Stay-open door hinge
    • Defrost water drain
    • Recessed handle
    • Very small footprint
    • Single wire basket
    • Adjustable legs

    The new Midea D+ system is about to change the way we think about chest freezers. It has a cooling pipe and layer design that saves space while increasing efficiency, so you can store more in less size.

    Midea has been blowing minds with their latest designs for some time now! The new Midea D+ create an incredibly efficient cooler of high capacity but small package – perfect for those with tight spaces.

    Specifications

    • 3.5 cubic feet capacity
    • Shipping Weight: 57 lbs.
    • Temp. Range: -11° to 10° F
    • 33 1/2″ H x 21 1/2″ W x 19 1/2″ D
    • Height with lid open 75°: 52 3/4″


    Things to Look Out For

    Size / Capacity
    Typical chest freezers range in size from three to 20 cubic feet, with an average of 15.

    When shopping for a new model, you’ll want to keep in mind that the wider and larger models will take up more space – but may be worth it if you need lots of storage.

    Defrosting Options
    Chest freezers that manually defrost need to be cleaned periodically. If the freezer becomes too full, it will not function properly and frost may build up on its interior walls. When this happens you’ll have to unplug your model, take everything out of it, chip away at the ice and frost with a sharp object like an old butter knife or vegetable peeler until all is removed from inside before plugging back in again for use!

    A self-defrosting chest freezer is less work to maintain but more expensive upfront. The coils will automatically heat up occasionally which keeps frost from forming.

    Garage-Readiness
    If you live in an extreme temperature region, it would be wise to go with a garage-ready design that can keep your food temperature stable when the freezer is placed somewhere very hot or cold. This will allow for more versatility and reduce operating costs because these units are made specifically for garages where they’ll spend most of their time.

    If your garage temperature doesn’t get below freezing very often or maxes out in the mid-90’s you should be able to get away with a standard chest freezer. Verify with the manufacturer the listed operating temperatures before purchase, however.

    Temperature Alarms
    Some chest freezers will come with a built-in audible temperature alarm. This will sound if the temperature rises to a level where your food could spoil and waste all of your precious goods.

    Having a unit with an alarm can give you peace of mind knowing that your food will stay fresh and safe, even in the event of a power outage.

    Lock and Key
    If your chest freezer has a safety lock, you’ll never have to worry about unauthorized users accessing the contents. This feature is particularly helpful if you plan on leaving it in an area that’s not well monitored or frequently visited by people outside of your household.

    If there are any concerns at all with security, this feature will help keep everything safe and secure inside while still being accessible enough so anyone really could use it when needed!

    Buying a Chest Freezer for Your Garage

    What is the best place to buy a chest freezer?
    If you’re looking for the best chest freezer and want to save some money, it’s important that you comparison-shop for prices on a few different sites. Prices can vary drastically from site to site – so don’t buy just one!

    It might seem like they offer more variety at an appliance store but even then, they may not have everything you’re looking for. And with the convenience of being online and browsing from home, it’s easy to compare prices without having to step foot in multiple stores!

    If you don’t want to shop online, we’ve found that Sears has a great selection of chest freezers for you to choose from, and with some really good prices!

    If you do your research before buying one, the right chest freezer can be an excellent addition to any garage – saving space as well as time. Happy shopping!


    FAQs

    How much does a chest freezer cost?
    For home units, prices range from the low $100s to over $1000. For a large unit (around 15 cu. ft.) expect to spend $500 – $700.

    For smaller freezers, prices can range from $100 to $500 for top of the line models.

    Is a chest freezer worth the money?
    A chest freezer can be a great purchase. You can buy groceries in bulk when they are on sale and store them away.

    If you have a large family they can be an absolute lifesaver!

    When preparing for a family get-together a chest freezer in the garage can be a blessing. Where else are you going to store 3 turkeys?

    What is the difference between a chest and upright freezer?
    There are a few key differences. First, a chest freezer has more depth, so it uses baskets that allow you more storage options without digging. The downside is that you can’t reach items as easily from the top because they’re buried in all that space – which also means those items are harder to find.

    Chest freezers tend to be cheaper to maintain than upright units as they are more efficient.

    Don’t forget that some upright freezers have an ice-making function which chest freezers do not.


    Now is the Time to Buy a Garage Freezer

    Chest freezers are much better than refrigerators in terms of storing frozen food for a long period.

    Unlike upright freezer models, chest freezers help maintain low temperatures with consistency and offer more space to store the foods as well.

    If you have the space, you won’t regret getting a chest freezer to stock up on deals at the grocery store and having the security a good supply of frozen food will supply.

    If you’re tired of running out of space in your fridge or paying high prices for groceries, then getting an extra chest freezer should come as no surprise. You can use it throughout all seasons with regular trips to the grocery store because they usually have good deals going on items like frozen veggies and meat that are perfect for stocking up!

  • Best Drop Spreaders Buying Guide 2021

    Best Drop Spreaders Buying Guide 2021

    Full drop spreader on lawnDisclosure: This post contains affiliate links. If you click through and make a purchase, I’ll earn a commission, at no additional cost to you. As an Amazon Associate I earn from qualifying purchases. Read our full disclosure here.

    If you’re a property owner, the amount of time and effort spent taking care of your lawn and gardens can be daunting.

    And it’s not just your time – there is a substantial financial investment when you consider all the equipment and products required to keep your yard in tip-top shape. But there are ways to help you stay on budget and cut costs where appropriate.

    One of the best steps you can take is to make informed choices on the tools you purchase. Fertilizer spreaders are one of the best investments you can make.

    Best Drop Spreader Comparison

    [amazon table=”3961″]
    [amazon table=”3966″]


    What is a drop spreader?

    Drop spreaders are pretty proficient in their ability to spread grass seed, fertilizer, sidewalk salt, and even weed killer with very little waste in the process.

    They work just as their name suggests. As they are pushed along, seeds are dropped straight down through holes in the bottom of the hopper.

    Unlike a broadcast spreader which spreads seeds over a vast distance, a drop spreader only covers areas it crosses. Broadcast spreaders can cover large areas quickly but often throw seed into places where it isn’t wanted.

    Using a drop spreader prevents seeds from going anywhere but straight down.

    What to Look for in a Drop Spreader

    hand over lush grass
    Drop spreaders may be one of the simplest lawn maintenance tools you’ll ever use. It has one purpose: to drop seed, fertilizer, or any other granular substances over your lawn.

    Drop spreaders are extremely simple. They have few working parts and perform a straightforward task, dropping seed, fertilizer, or other granular substance.

    The most important thing to look for when purchasing is sturdy construction. For example, the plastic hopper used to hold the seed should be solidly built with holes large enough to let sand, seed, or fertilizer flow quickly through.

    The axle and wheels should be durable as well. Most drop spreaders come with wheels that are 10 to 12 inches. This gives ample room for the seed to drop to the ground as the spreader passes over.

    It also keeps the hopper high enough off of the ground so that objects it passes over cannot block the holes and obstruct seed flow. Most spreaders have solid wheels made of highly durable plastic and are capable of moving over various types of terrain.

    The handle on a drop spreader should be high enough for a person to quickly push it in front of them. or pull it from behind. The majority of spreaders have adjustable settings, so the handles can be raised or lowered as needed, depending on the height of the individual using it.

    In some cases, cushions are placed on the handle to improve grip and relieve stress on the hands if there are large amounts of distance to be covered.

    Popular Drop Spreader Brands

    Scotts Drop Spreaders

    Scotts’ line of drop spreaders are well built and easy to use. Their durable construction allows for easy maneuvering and stability. In addition, they come with a trigger handle designed to control the flow of the seed.

    If the trigger is released, the holes are covered so that seed will be prevented from pooling under the spreader if it sits in one place. The hopper on most Scotts’ spreaders is 22 inches wide which allows for maximum coverage.

    The Turf Builder Classic holds enough Scott’s lawn care product to cover 10,000 square feet of lawn. In addition, the spreaders come fully assembled and ready to use.

    Agri-fab Drop Spreaders

    Agri-fab’s hopper capacity is approximately 17 gallons which will provide coverage over 10,000 square feet. The hopper itself is made of durable plastic polymer and will last several years if properly maintained.

    The Agri-fab drop spreader has a width of 42 inches and spreads evenly along the entire drop zone. It includes a galvanized steel agitator that prevents clumping and allows for even and uniform coverage. In addition, wide, pneumatic tires will enable the carriage to roll smoothly over existing grass without creating deep tracks or imprints.

    Precision Products Drop Spreaders

    Precision Products drop spreaders are well built and large enough to hold 50 pounds of product. It offers a 10 to 2-inch spread pattern. The heavy plastic hopper and steel tube frame provide strength and durability, ensuring long life with proper care.

    Seed flow is controlled by a fingertip cable mechanism that allows for continuous and uniform delivery. Spreads seed or fertilizer quickly and easily with little mess and less waste.

    Earthway Drop Spreaders

    Earthway Drop spreaders are designed for many years of use. A steel tube frame and heavy-duty plastic polymer hopper are designed to provide years of service and reliable distribution of whatever product is being delivered.

    Solid plastic wheels provide smooth transportation and a uniform spread of both seed and fertilizer. A fingertip-controlled cable system is in place to ensure the flow of the product is easily maintained at the desired speed. The handle is adjustable to accommodate almost any individual’s height and stature.

    Commonalities

    Drop spreaders are similar to one another in many ways. For example, most are easily adjusted to a person’s height, and product flow can be adjusted through control cables or trigger mechanisms.

    The basic concept of the product is to drop the seed in a controlled fashion and eliminate needless waste. Unfortunately, when it comes to choosing a spreader, many rely on name brands they have used in the past.

    Most spreaders carry ratings that will also help a person to choose which one may work best for them.

    Our Top Drop Spreader Choices

    Scotts Turf Builder Classic Drop Spreader

    [amazon box=”B002ZTK09U” template=”horizontal”]
    If you’ve got a medium to large-sized lawn, this may be the drop spreader you’ve been searching for. Its hopper can cover up to 10,000 sq feet, so no need to stop and refill.

    Also, it comes fully assembled so you can get right to work. And it’s made by Scott which is a well-known name in lawn care. On the downside, there are some complaints about the wheels and how they may trap some of the product that you’re spreading.

    Pros

    • Large capacity hopper
    • Can cover 10,000 sq ft
    • Pre-assembled
    • Sturdy frame

    Cons

    • Does not spread rock salt well
    • Wheels can get become unstable

    Scotts Turf Builder EdgeGuard Mini Broadcast Spreader

    [amazon box=”B07JQHL66D” template=”horizontal”]
    This mini spreader may be small, but it is still mighty. It can hold enough seed or fertilizer to cover up to 5,000 sq feet of lawn, so it is certainly enough to cover smaller yards.

    Also, this spreader is equipped with EdgeGuard to protect your sidewalks or landscaping. Finally, it comes fully assembled, so no worries about assembly.

    And if you’re limited on space in the garage, you’ll love the fold down handle that allows for easy storage. Given that it is a smaller unit, some people have stated that it is not as sturdy as the Classic Drop Spreader.

    Pros

    • Perfect for smaller yards
    • Can cover 5,000 sq ft
    • Pre-assembled
    • Fold down handle for easy storage

    Cons

    • May not be as sturdy as larger model

    Chapin International 8400C Chapin Professional SureSpread Spreader

    [amazon box=”B072FK465J” template=”horizontal”]
    Homeowners who live up north need to have a drop spreader that can go beyond simple yard maintenance. You need equipment to help you spread ice melt and salt to your driveway, walkways, and other areas.

    The Chapin 8400C with its stainless steel frame and enclosed gear box is an excellent choice to get your through all four seasons. This model also comes with 14-inch wide pneumatic tires so it can handle whatever terrain you have.

    Pros

    • Stainless steel frame
    • Enclosed gear box
    • Can handle salt and ice melt
    • Pneumatic tires

    Cons

    • A few customers reported missing parts

    Agri-Fab 45-0288 175-Pound Max Tow Behind Drop Spreader

    [amazon box=”B000KL1L6Q” template=”horizontal”]
    If you’re a homeowner with a lot of acreage, you need to look into this tow behind spreader. The universal hitch fit makes it a breeze to connect to whatever tractor you are using.

    Also, the hopper holds up to 17 gallons which is enough to cover one square acre. And finally, the steel agitator will help your spreader to be productive for years.

    On the downside, this model does not come fully assembled so be prepared to dedicate a few hours to get it put together.

    Pros

    • Great for acre+ yards
    • 42-inch spread width
    • Universal hitch
    • Galvanized steel agitator

    Cons

    • Requires assembly
    • Some mods may be required

    Summary

    As you can see, there is a wide range of drop spreaders available.

    For the majority of us, the [amazon link= “B002ZTK09U” title= “Scott’s Turf Builder Classic (Amazon link)”/] is more than sufficient to meet our needs throughout the spring and into late summer.

    If you’ve got a more extensive area, then you may require a [amazon link=” B000KL1L6Q” title=” tow-behind model (Amazon link)”/].

    And for those that have harsh winters and plan on spreading salt or ice melt, you may need to invest in the [amazon link=” B072FK465J” title=” Chapin 8400C (Amazon link)”/].

    Regardless of the particular model you choose, a drop spreader will help you with equal and consistent spreading to achieve your lawn care goals.

  • Best Electric Smoker – Top Models in 2022

    Best Electric Smoker – Top Models in 2022

    Ribs and beer on table


    Whether it’s sausage, ribs, brisket or even a whole pig, the tender, tasty slow-cooked flesh and woodsy aroma of smoked meats can become an addiction. With your own smoker, you won’t have to go far to get your fix.

    According to Consumer Reports, a quality smoker can make meat taste like it’s been cooked in a genuine below-ground smoke pit. Imagine the ease of filling your electric smoker with choice cuts of meat that cook over mesquite or hickory chips at your leisure while you and your friends enjoy the aroma in the great outdoors.

    Quick Look at Some of Our Favorites

    [amazon table=”3551″]


    That’s the fun scene that’s possible if you invest in an electric smoker–not to be confused with a propane smoker.

    An electric smoker comes with many benefits over propane or charcoal smokers:

    It’s convenient.

    • There’s no propane tank to buy or refill. No charcoal is needed. You just plug it into any readily available outlet, and you’re ready to go.

    It has great temperature control.

    • As every barbecue king knows, having the right temperature when you’re smoking meat slow and low is crucial if you want to avoid tough, chewy, overly charred meat. Duck can handle a 325-degree searing but ribs thrive best when smoked at a 225-degree temp.
    • Worried? Don’t be. Just turn the dial to the right temperature and leave it. Most electric smokers have temperature controls to prevent the heat from fluctuating like it does with traditional smokers. As a bonus, many electric smokers come with their own temperature gauge.

    It’s safe.

    • An electric grill is less susceptible to fires and flare-ups so you can feel comfortable using it on your wood deck or any space close to your home.
    • You don’t need to handle any flammable lighter fluid or propane. You can also walk away and tend to other chores without worrying if something will be aflame when you return.

    It can double as a cold smoker.

    • Many electric grills come with temperature options low enough to preserve meats by cold smoking them at 75 to 140 degrees over several days or weeks to cure them. That means you can make jerky, aged smoked cheese, or cured ham.

    The clean up is easy.

    • Unlike propane and charcoal grills, electric grills have less char and residue. They can be wiped up quickly.

    Five Best Smokers

    Masterbuilt MB20070210 MES 35B Electric Smoker, Black

    This tall, slim, black steel smoker on four legs comes with three well-spaced chrome-coated smoking racks, enough to cook several meats at one time, including whole turkeys or suckling pigs.

    The coating will prevent your meats from sticking and lessen clean up. Flavor your meats with the built-in wood tray and keep the meats moist with the included water bowl.

    The smoker is designed to make temperature management easy. It has a built-in temperature gauge, a dial for various temperature settings, and an air damper than can be used to modulate the heat and smoke.

    Best features:

    • Smoke control
    • Temperature dial
    • Wood tray, water bowl and grease tray included.
    • 1,500-watt heating element
    • 57 pounds.
    • Maximum temperature: 275 degrees

    Pros

    • Large size offers lots of smoking space with 12 inches between each rack.
    • Easy assembly
    • Maintains temperature in cold weather.

    Cons

    • No side drawer for wood chips. Main compartment must be opened to replenish chips.

    Masterbuilt Smoke Hollow Digital Electric Smoker

    This advanced steel box-style smoker is distinguished by its easy-to-read digital panel that controls temperatures and time. Just input the exact temperature you want and how many hours you want to smoke your meat.

    The Masterbuilt Smoke Hollow will manage the rest. There is also an air damper so you can regulate the amount of smoke for the perfect taste.

    Although rare for a smoker in this price range, the Smoke Hollow has insulation, which prevents heat escape so your meat cooks consistently while you save energy. A wood chip drawer allows you to flavor meat with chips or chunks of your choice.

    Best features:

    • Digital controls for a set-it-and-forget-it cooking style.
    • Integrated thermostat
    • Three chrome racks
    • 800-watt heating element
    • 46 pounds
    • Maximum temperature: 275 degrees

    Pros

    • Insulated box
    • Compact size
    • Drip pan and water bowl included.

    Cons

    • Low to the ground, which means you have to bend to load the meat or buy a stand to sit the smoker on.
    • No side wood chip loader.

    Bradley Digital 6 Rack Smoker BTDS108P 990223

    As the name implies, this 39-inch tall silver stainless steel smokehouse comes with six racks for cooking an array of food; that’s nearly double the number of racks for the average smoker.

    Equipped with digital controls for the smoke, heat and time, the smoker reduces your efforts by managing all elements for up to eight hours and alerting you when your cook time is over.

    There’s an ash catcher to remove the soot from burned wood chips. The maximum temperature is 280 degrees. A wood chip feeder inserts new wood pucks into the smoker every 20 minutes so you don’t have to worry about supervising the stove and replacing wood chips yourself.

    Best Features:

    • Digital console
    • Wood chip feeder
    • Separate smoke generator
    • Six racks that are 15 inches wide and 33 inches long.
    • 500-watt heating element
    • 60 pounds

    Pros

    • Comes with a cover.
    • Fully assembled.
    • Wood feeder removes old wood pucks to a water bowl to prevent burnt wood taste.

    Cons

    • Weak heating element
    • Requires wood briquettes instead of chips

    Dyna-Glo DGU732SDE-D 30″ Digital Bluetooth Electric Smoker

    If you think the push-button digital control panel on the Dyna-Glo electric smoker is convenient, wait until you use your smartphone or tablet to set temperatures and cooking instructions.

    Enhanced with Bluetooth, you don’t even have to be near this smoker to monitor and manage the cooking process.

    You also don’t have to leave the smoker in one place. Feel free to roll it anywhere, including to a park or a friend’s house; its four casters make it highly mobile and portable.

    A bottom access drawer enables you to add water or wood chips without opening the meat compartment and letting out the precious smoke and heat.

    Best Features:

    • 4 chrome-plated steel grates
    • Special rib racks and sausage hooks
    • 1,000-watt burner
    • Casters and rear handle for easy mobility.
    • Dyno-Glo App for Bluetooth capability.
    • Digital controls

    Pros

    • Glass door to observe cooking progress without opening smoker.
    • Integrated meat thermometer included.
    • A door seal stops heat from escaping.
    • Compact
    • Maximum temperature is 300 degrees

    Cons

    • Legs not included. Must be purchased separately.

    Pit Boss Analog Smoker

    If you’re looking for the best electric smoker for the money, this Pit Boss smokehouse will not disappoint. The bright blue steel Pit Boss Analog Smoker has three widely-spaced racks to allow you to cook several meats at one time.

    The internal elements are made of porcelain, known for its heat stability at low and high temperatures. The front-loading wood tray can be accessed without opening the main compartment.

    So, the meat never has to be disturbed when replacing chips.

    Best Features

    • Separate wood chip drawer
    • Simple temperature knob
    • See-through front window

    Pros

    • Porcelain-coated racks
    • Porcelain wood chip tray and water pan included
    • Maximum temperature is 325 degrees
    • Includes meat probe

    Cons

    • No digital controls

    Other Great Electric Smokers

    Best Electric Smoker For Beginners

    Smoke Hollow 26-Inch Electric Smoker

    Elevated on three legs, the Smoke Hollow smoker comes with two adjustable cooking racks as well as adjustable temperature control.

    The uncomplicated design makes this perfect for a novice. The thermometer on the door lets you see the inside temperature at a glance.

    A porcelain-coated wood tray and a separate porcelain water pan help you add flavor and moisture to the cooking meats.

    At just 35 pounds, this smoker is easy to tote so you can use it anywhere there an electric outlet.

    Best Features:

    • Chrome-plated cooking grids
    • 1500-watt heating element
    • Easy assembly

    Pros

    • Cool touch door handle
    • Maximum temperature is 325 degrees
    • Lightweight, portable

    Cons

    • No side wood chip access.
    • Poor temperature control.

    Best Small Electric Smoker

    Masterbuilt Portable Electric Smoker

    Less than 24-inches high and weighing only 22 pounds, this Masterbuilt smoker is made to travel. Take it to the football tailgate, the campsite or to any recreation spot to smoke meat with your buddies.

    This compact smoker has a steel cube style with two foldable stainless steel legs. Inside, you can fit two racks worth of meat. You can also take out one tray and fit an oversized turkey or pig.

    A knob allows you to manually control the heat, using low, medium and high settings.

    Best Features:

    • 1400-watt burner
    • Simple temperature dial
    • Two chrome-coated racks
    • 730 square inches of cooking space

    Pros

    • Wood tray and water plan included
    • Can reach temperatures higher than 250 degrees

    Cons

    • Exact temperature cannot be set.

    Best High End Electric Smoker

    Cookshack AmeriQue Electric Smoker Oven

    Made with the best digital technology, this double-walled stainless steel smoker will digitally set the temperature, smoke level and time — and then turn off the heat, but keep the meat warm once it’s done.

    You’ll never have to guess if the meat has reached the right temperature since the smoker comes with an internal meat temperature probe.

    This powerhouse smoker can heat up to 300 degrees.

    Best Features:

    • Double walls for good heat insulation
    • Digital control panel
    • Meat probe

    Pros

    • Small size
    • A hold setting.
    • Good temperature control

    Cons

    • Expensive replacement parts

    Ribs and beer on table

    Additional Information

    How to Use Your New Electric Smoker

    When you first get your smoker, follow these steps for the best experience.

    1. Season the meat with a dry rub and leave in the refrigerator overnight.
    2. Soak wood chips of your choice overnight. Consider mesquite, maple, cherry, oak or hickory.
    3. Season the smoker.
    4. Power on the smoker and set the temperature.
    5. While the smoker is pre-heating, add the wood chips.
    6. Place a pan of water at the bottom of the smoker to create humidity and moisten the meat.
    7. Add the drip pan to catch grease if one comes with your unit.
    8. When the desired temperature is reached, add the meat and set the timer.

    How to Season Your Electric Smoker

    Season any new electric smoker to get rid of any residue left from manufacturing. Put oil in a spray bottle.

    Spray the interior surface of the smoker with oil: racks, walls, the inside of the door, etc.

    Turn the smoker on and set it at the highest temperature for two hours. Do not fill the water pan for the seasoning process.

    Meat Seasoning Tips

    A dry rub comprised of garlic powder, paprika, onion powder, chili powder, salt, cayenne and brown sugar is versatile enough to season any meat.

    For a glaze, consider mixing bourbon with vinegar and honey.

    How to Clean Your Electric Smoker

    After every smoking session, use a bristle brush to remove grease and residue from the grates, floors and doors of your smoker.

    Wipe out the grease pan and wash the water pan. Lastly, use a damp cloth dipped in hot, soapy water to wipe down the interior.


    Frequently Asked Questions

    How long will the wood chips last?

    In most smokers, wood chips will last an hour. Add another half cup of wood chips every hour to create more flavor if your smoker lacks an automatic wood chip feeder.

    Do I need to soak the wood chips first?

    No, you do not have to soak wood chips first. However, soaking chips from 30 minutes to eight hours in water, beer or apple juice will impart a more intense smoke flavor. Also, soaking prevents the wood chips from burning too quickly, which will save you the hassle of replenishing chips frequently. Some opt to mix dry and soaked chips.

    What is the purpose of the air damper?

    Partially opening and closing the air damper helps to control the heat and smokiness by adding oxygen to the fire and allowing heat or smoke to escape. You can open and close the damper as much as you want to achieve the temperature and flavor you desire.

    Is smoke supposed to come out from the door area?

    It’s normal for smoke to leak through the door hinges. It will not hinder your meat from cooking nor reduce the smoke flavor. You can put a gasket on the door to reduce leaks, but that is not necessary.

    How long does it take to cook the meat?

    Unlike typical barbecue grills, smokers are designed to heat meats at a low temperature so they take longer to cook. Different meats require different temperatures and cooking times.

    For example, ribs will take five hours to smoke at a temperature of 235 degrees while salmon can be smoked quickly at 220 degrees for an hour.

    Here are typical cooking times for popular meats:

    • Suckling pig: 250 degrees for three hours.
    • Sausage: 225 degrees for two hours.
    • Pork Roast: 225 degrees for five hours
    • Small Turkey: 300 degrees for five hours.
    • Ham: 250 degrees for five hours
    • Lobster: 220 degrees for 50 minutes
    • Brisket: 220 degrees for 12 to 15 hours.

    Can I use my smoker for vegetables or drying meat?

    Yes. Smokers are a great way to impart flavor to vegetables, such as artichokes, onions, squash, zucchini, corn, eggplant and even cabbage. Just drizzle with olive oil. Add some herbs and spices. Then place in the smoker for roughly 45 minutes.


    Barbecue, roast and smoke meats to your heart’s content with any of these electric smokers. The final result will be succulent flesh falling off the bone with gourmet flavors that delight your friends and family.

    All will laugh and have a good time cooking out. They’ll be asking for seconds and wanting to make your place and your smoker a regular destination.

  • Best Gas Grills Under 300 Dollars

    Best Gas Grills Under 300 Dollars

    Under 300 Dollar Grill Reviews


    With summer in full swing, grilling is finally back in season. From gas to charcoal, grills are blazing along with the heat. As we all know too well, not all grills are created equal, especially among affordable models.

    Doing your homework is a must since no one wants to drop a ton of money on something that’ll need to be replaced or repaired.

    Best Gas Grills on a Budget
    [amazon table=”2243″]

    [amazon table=”2244″]
    While many homeowners prefer to skip the hassle of charcoal and go right to gas, some folks remain on the fence about the cost of making the switch. We say worry no more!

    We’ve taken the expensive trial and error out of gas grilling on a budget to bring you the best gas grills under 300 dollars.

    The Top 6 Best Gas Grills Under $300

    While there are tons of options on the market, we’ve compiled a list of the best gas grills for under $300, making the process easier than spending hours combing through reviews or wasting money on poor-performing products.

    Each of these options offers performance and power for a variety of households, whether you’re a family of two or a frequent host for cookouts, barbecues, and other gatherings. We’ve listed both pros and cons which highlight major factors to consider in your decision.

    1. The Cuisinart CGG-7400

    Cuisinart CGG-7400
    This image links to Amazon

    This grill is an all-around hit with us. It offers multiple burners, power, and durability which are important features when considering a bbq grill.

    It has four 11,000 BTU burners, allowing you to control heat in sections, banishing cold spots and unevenly cooked food.

    It also has a 167-inch warming rack, allowing you to remove items from direct heat as needed. The built-in lid thermometer allows for easy cooking and food monitoring without opening the lid and losing precious heat. It also has two convenient prep tables on either side of the grill surface.

    And let’s not forget that built-in bottle opener which will definitely come in handy. The grease tray is small, which is a pain for seamless grilling.

    No one likes to pause to empty a grease tray, but not doing so can be dangerous. It also lacks any storage space underneath the grill.

    Check Price on Amazon

    CGG-7400 Pros

    • Four 11,000 BTU burners with control knobs
    • Has a 167-inch warming rack
    • Built-in thermometer
    • Prep table on each side of the grill surface

    CGG-7400 Cons

    • Grease tray is small, which is a pain for seamless grilling. No one likes to pause to empty a grease tray, but not doing so can be dangerous.
    • Gets very hot all over while in use which is a potential safety hazard
    • Metal seems a bit thin which may dent easily
    • No side burner
    • No added storage space beneath

    2. The Char-Broil Performance 300

    Char-Broil Performance 300
    This image links to Amazon

    This propane grill is another solid performer in our book that offers a decent amount of cooking space and power for your buck. It is smaller than the Cuisinart but it does include two burners for 24,000 overall BTU.

    This gives it about 300 inches of cooking space, which is a decent amount for cooking for small gatherings. There’s also another 100 inches of heating rack for rotating food as needed. Like the Cuisinart, it also has two large side trays for prepping.

    The temperature gauge is lid-mounted for monitoring the heat without opening the lid and disrupting cook times. It is small and compact, avoiding the bulky feel seen in many bbq grills. The grease pan is removable for effortless cleanup.

    There are a few issues though. The primary issue is that it takes more time to heat up than other grills.

    And that heat is not high as other units in this price point.

    Check Price on Amazon

    Performance 300 Pros

    • Two burners at 24,000 BTU overall
    • Additional swing-away warming rack for food rotation
    • Grates are porcelain-coated cast-iron grates
    • Includes two side trays which fold down when not in use
    • Convenient storage available beneath for accessories

    Performance 300 Cons

    • Cooking space is deep but narrow
    • No side burner included
    • Cooking may be uneven
    • Grill components are prone to dent

    3. Char-Broil Classic 360

    Char-Broil Classic 360
    This image links to Amazon

    We loved a lot of things about the Char-Broil Classic 360 from its nifty additions to its multiple burners. Three burners offer 36,000 BTU of heat, making it a powerful addition to your grilling arsenal.

    It has 360 inches of cooking space provides plenty of room for cooking burgers and hot dogs at the next cookout. The cooking space is shallow but wide at 26 inches x 14 inches, so you’re not forced to reach far over the heat to flip food.

    It also includes an 8,000 BTU side burner for warming side dishes or condiments along with a heating rack for removing items from heat as needed.

    However, because one side shelf is used for a burner, there’s less prep space than some other grills. If it was mounted lower and contained a cover for when not in use, this would be a non-issue.

    We also found that the assembly was more tedious than other grills in this price point. And with no lid temperature gauge, you’ll have to keep opening the grill which causes it to lose heat.

    Check Price on Amazon

    Classic 360 Pros

    • Three burners for total of 36,000 BTU of heat
    • 170-inch swing-away heating rack for additional cooking
    • Comes with an 8,000 BTU side burner
    • Side shelves for prepping
    • Wheeled design for portability

    Classic 360 Cons

    • Less prep space with inclusion of side burner
    • Assembly more tedious than other options
    • No drip pan included
    • No lid temperature gauge, which is a huge drawback.
    • No additional storage space offered underneath

    4. Megamaster 720-0983

    Megamaster 720-0983
    This image links to Amazon

    This is another standout star for us in the affordable grill category. It’s an incredibly powerful unit with a lot of space, making it perfect for cookouts.

    If offers a whopping 54,000 BTU of heat between six burners and heats up quickly and evenly thanks to porcelain flame tamers that prevent flareups.

    A staggering 543 square inches of cooking space make cookouts a breeze along with 210 inches of warming rack space.

    It includes a decent-sized grease trap that doesn’t need to be emptied as frequently during cooking as some other options out there. From a design aesthetic, the black does not seem as attractive as stainless steel.

    It is also going to show dirt easier as well. And while there is some storage space below but it is quite small.

    Check Price on Amazon

    Megamaster Pros

    • Has six burners with total of 54,000 BTU
    • 210 inches of warming rack space is the largest of these six grills
    • Cast iron cooking grates for nonstick grilling
    • Large-sized side tables offer plenty of prep space
    • Built-in thermometer for temperature monitoring
    • Small amount of storage space available below

    Megamaster Cons

    • The side trays do not fold in taking up more space
    • Design is somewhat bulkier than other models
    • Shows dirt easier than stainless steel designs
    • While there is storage space beneath, it isn’t as hidden or protected as other options

    5. Char-Broil Classic 280

    Char-Broil Clasic 280
    This image links to Amazon

    The Char-Broil Classic 280 was another solid performer for us and well within the lower end of this price range.

    It’s small but it still has two burners offering 20,000 BTU of heat total with an 8,000 BTU side burner for preparing side dishes.

    It has porcelain-coated grates for easy cleanup and a side tray for prep work. This unit also has no lid-mounted thermometer and there is no drip pan.

    As I stated earlier, it’s quite small so while it’s good for an individual or couple, it is less than ideal for large families or cookouts.

    And finally the assembly not for the faint of heart with numerous pieces and difficult instructions.

    Check Price on Amazon

    Classic 280 Pros

    • Two burners offering 20,000 BTU of heat total
    • Does have an 8,000 BTU side burner
    • Has a side tray that offers prep space
    • Knob design for easily adjusting the temperature as needed
    • Wheeled for easy mobility

    Classic 280 Cons

    • No lid-mounted thermometer
    • Assembly is tedious with too many small parts and instructions.
    • Smaller cooking space overall
    • No drip pan included
    • No additional covered storage offered

    6. The RevoAce 4-Burner

    RevoAce 4-Burner
    This image links to Amazon

    This is another quality option for those seeking a quality grill without breaking the bank. Some of our favorite features are four burners packing 48,000 BTU of heat overall for multiple heat zones. It has 480 inches of cooking space which is great for hosting parties.

    There is also a side burner that has a cover for when not in use along with a 180-inch heating rack. The cooking grates are porcelain-coated cast iron for easy cleaning and maintenance.

    Lid-mounted temperature gauge for monitoring at a glance is standard and there is a removable drip pan for easy cleaning.

    This unit can also be converted to natural gas if you have an outdoor hookup. On the negative, it’s size could be problematic for some, especially if you have only a small patio or backyard.

    Also, this model does not have any additional storage underneath the grill as some others do.

    Check Price on Amazon

    RevoAce Pros

    • It has four burners for a total of 48,000 BTU
    • Side burner has a cover which maximizes prep space
    • Includes a 180-inch heating rack
    • Additional side tray for prep space or storage
    • Lid-mounted temperature gauge for monitoring at a glance
    • Removable drip pan for easy cleaning
    • Can be converted to natural gas if you have an outdoor hookup

    RevoAce Cons

    • Can be bulky in smaller spaces such as balconies or narrow patios
    • No additional storage beneath like some other

    What to Look For When Buying a Gas Grill

    Grilling beef kebobsIt’s essential to keep a few things in mind when you’re looking for the perfect gas grill for your family and budget. Try not to get caught up in all the extras, and focus on these critical aspects.

    Size

    You can have the greatest grill in the world, but if it’s too small for your family, it won’t do you any good. Only being able to cook a limited amount of food at one time is frustrating if you entertain large groups of people regularly.

    On the same note, keep in mind the amount of outdoor space you have to dedicate to a grill. You don’t want a bulky unit on a tiny patio, for instance.

    Your best bet is to seek a grill that can handle your family’s needs plus a few guests.

    Power

    When hunting for a grill, it’s important to keep BTU (total heat output per hour) in mind. Several burners are great, but if the overall BTU is low, that won’t do you any good, and you may experience unevenly cooked food or longer cook times.

    You want to make sure you get a powerful grill for your money, especially if you plan on entertaining groups of people frequently with it.

    Heat distribution

    Tied into power and BTU is overall heat distribution. A grill must evenly disperse heat to prevent under cooked or overcooked food.

    For multiple burners, they should ideally give off the same BTU per burner to avoid these issues. Most grills with multiple burners allow you to control the heat of each by a knob per burner.

    For grills that contain multiple burners, this is a must if you want complete control of cooking temperature.

    The addition of heating racks is ideal if you often cook proteins and vegetables together or cook large amounts of food at the same time. With heating racks, you can move items off direct heat but still, keep them warm while others finish below.

    For cookouts, heating racks are usually a must.

    Durability

    While you are looking for an affordable unit, you don’t want something flimsy that will need replacing in a year or so and cost you more money in the long-run.

    Pay attention to construction, and seek out stainless steel or powder-coated steel designs.

    You also want to take note of how knobs are assembled. If they look or feel cheap, you might want to reconsider, as replacing knobs can get pricey over time. It can also be a safety issue.

    Ease of cleanup

    Consider how easy a unit is to clean when making your decision. Ideally, you want cast-iron grates that prevent sticking to avoid built-up drippings that are not only unsightly but also a fire hazard.

    You also want to take note of the drippings pan or lack thereof. A removable pan is ideal for mess-free grilling.

    Other features

    Think of what you need in a grill. Extra storage is always preferred, as is added prep space that is typically found on side trays.

    When grilling, you may have spatulas, meat forks, and plates that need to be set down as the food cooks. Running back and forth to another surface gets old quick when you’re standing next to a hot grill under the sun.

    You should also consider how you’d like to use your grill. Is it remaining stationery on your patio, or do you plan on bringing it camping or tailgating?

    For those seeking something portable, wheeled and fold-able options are becoming more common in grills.

    This can also be helpful for winter storage if you plan on tucking it in a garage or shed for safekeeping.

    Of course, safety is another feature you should never overlook. While push-button starts are a favorite, they can be a serious risk if small children are present.

    Some grills are equipped with knobs that require you to push and turn a knob which is ideal compared to a push-button design. Grease pans are another important safety feature you should pay attention to.

    They’re essential for preventing dangerous flareups, but should be removable and tucked away safely and securely to avoid accidental burns.


    Frequently Asked Questions:

    Friends having outdoor barbeque

    Q: How Can I Make My Grill Last Longer?

    A grill can be a big investment so you want to do all you can to keep it in great working order.  Here are a few steps you can take:

    1.  Use a grill cover. Weather can have such a damaging effect on your grill’s appearance and functionality. You can buy a standard grill cover or get a customer cover built specifically for your grill. Protect your grill from rain, snow, and whatever else Mother Nature throws your way.
    2. Clean your grill regularly after each use. You need to scrub the grills with a brush and don’t leave them covered in grease or other food once you’re done. You may even need to remove the grates and clean them in hot, soapy water every few months depending on how often you use your grill.
    3. Make sure you empty the grease trap. Not only is this a maintenance issue, but it could also become a serious safety issue as well.

    Q:  What Are The Best Grill Add-Ons?

    You can get some great accessories for your gas grill. These can add a lot of cooking options such as:

    1. Smoker box: There are a number of boxes you can use to turn your grill into a smoker. Simply add wood chips to the box and place it over the flame.
    2. Rotisserie rods: If you want to cook a whole chicken or small turkey, you can add a rotisseries rod to your grill. The rod will rotate and allow the chicken to roast in its own juices.
    3. Rib rack: This is a great tool to cook multiple slabs of ribs at one time. By adding vertical space you can cook additional items in addition to the ribs. Many of them have handles so you can transfer the ribs right to the kitchen or table.
    4. Pizza kit: You can turn your grill into a pizza oven with a great pizza kit. These often contain pizza stones, pizza peels, cutters and screens. This is a great choice if you have a family with small children.

    Q:  Should I Buy A Separate Side Burner?

    A side burner can be extremely useful if you need to cook something such as vegetables, soups or rice along with your main grill items.

    Buying a separate side burner can be expensive – it might cost you about 40%-50% of your grill.

    I recommend just investing in a propane grill that already includes a side burner. I’m confident you will find it more convenient and economical in the long run.

    Conclusion: Picking a good grill under $300

    When it comes to picking the best gas grill for you under 300, you need to consider your lifestyle and expectations. Every option has its own list of pros and cons to evaluate and compare against your wants and needs.

    Not every person will be satisfied with the same product. Take a peek at our breakdown of quality grills that don’t cost an arm and a leg to make the decision easier, and get to grilling!

    We will be adding even more grills reviews this summer, so be sure to subscribe in the right column.

  • The Best Mulching Blades for Lawn Mowers – Review of the Top Blades for 2021

    The Best Mulching Blades for Lawn Mowers – Review of the Top Blades for 2021

    The Best Mulching Blades For Your MowerDisclosure: This post contains affiliate links. If you click through and make a purchase, I’ll earn a commission, at no additional cost to you. As an Amazon Associate I earn from qualifying purchases. Read our full disclosure here.

    What is a Mulching Mower?

    Mulching is the process of using your own grass clippings as fertilizer. Dropping the finely-cut grass onto your lawn allows it to blend in with the soil’s surface and break down, releasing nutrients that improve the health of your turf.

    Instead of buying mulch and placing it around certain areas of a lawn, a mulching mower uses grass clippings to spread a compost throughout your yard. The mulch produced by your own lawn mower provides essential nutrients like nitrogen, potassium, and phosphorus that your lawn needs to stay healthy.

    Mulching kits are available for both a tractor-style lawnmower and push-mowers. The question isn’t whether you should mulch, but rather what mulching mower would be best for you. That’s what we’ll be discussing in this post.

    The Top Reasons Why Should You Mulch Your Lawn

    If you’re accustomed to bagging your clippings, you know what a hassle it can be to stop what you’re doing, remove the bag, throw everything away, and then hook everything up again. Not only are you throwing away clippings that could be recycled, but you’re also repeating a tedious task over and over again. Self-bagging mowers were a great idea – but not as great as mulching mowers.

    discharging grass clippings onto lawn
    Discharging grass clippings straight to your lawn without mulching first is unsightly and harms your grass.

    Mulching mowers also save you money by fertilizing your lawn naturally and save you time by doing so immediately. Rather than taking the bag off your mower and throwing things away, or trying to keep a compost pile, why not cut the cost and time in half by fertilizing as you mow?

    Create a healthier lawn you can be proud of, and do it all in one step. The options available today are to purchase a mulching mower itself or use a mulching kit to convert the mower you already have into a mulching mower.

    Advantages and Disadvantages of Using Mulching Blades

    There are far more benefits to using mulching blades than standard blades. This is because mulching blades are still capable of doing all the tasks normal blades can accomplish and more, such as discharging and bagging the clippings.

    With the added benefit of being capable of mulching, these blades are often called “3-in-1” or “all-purpose” blades. These blades shred the grass and leaves into much finer pieces, creating an easier and quicker decomposing process.

    Opting to use a mulching blade and mulching your lawn means no need to dump the collected grass clippings in a compost pile and less work for you. On the downside, mulching your lawn means clippings that are resting on the top of the grass and are now easier to be tracked into one’s home and leave grass stains.

    Standard lawn mower blades are limited to the simple functions of just cutting and discharging the leaves or grass clippings. Because the grass does not encounter more blade surface, it is not as finely cut as it would be with a mulching blade and thus take longer to break down to recycle its nutrients back to the soil. The following are what we consider to be the best mulching blades available for the consumer market.

    The Best Mulching Blades

    Often, mowers that are capable of mulching look identical to those that do not because often the only difference may be the blade being used. As mentioned before, many lawn mowers can be adapted to do such by changing out the blades.

    As for the best mulching blade, there’s a lot to factor in, including personal preference. Make sure you know ahead of time what size you’ll need.

    It’s also a good idea to shop and buy from a store that allows returns in case the blade doesn’t fit your mower correctly. There are tons to choose from, but they’re pretty easy to find – for instance, there are several fantastic options on Amazon.

    Maxpower 331981S Mulching Blade

    Maxpower Lawn Mower Blade
    This image links to Amazon

    The Maxpower 331981S 21-inch universal (check price on Amazon) is our top pick. It’s about the same price as the Arnold but comes with specialized cutting teeth intended for a finer cut, and with a centrifugal airlift design, the grass is evenly distributed throughout the lawn.

    It also comes with a cover washer, and 6 reducing washers. This one is a little wider, at 4 inches, but is still lightweight at 2 pounds. And best of all they’re built to fit most riding lawn mowers including Poulan, Craftsman, and Husqvarna because they include multiple different adapters for ease of attachment to your mower.

    Buy on Amazon

    Be careful not to mount the blade upside-down. If you think it’s not working very well, flip the thing over. People have described this blade as a miracle cure. It comes pre-sharpened, but you may want to double check the edges.


    Arnold Universal 3-in-1 Mulching Blades Set

    Arnold Mulching Blade
    This image links to Amazon.

    The Arnold Universal 3-in-1 mulching blade (check price on Amazon) is a great option because the same brand sells different lengths of blade, from 20 inches to 22 – something Arnold must have learned after 50 years in business.

    The strong metal blade and unique tooth design shred grass to ultrafine pieces with the idea of returning key nutrients back to the soil. It’s pre-sharpened as well so you can run right out and try it right away.

    Buy on Amazon

    It also comes with adapters and washers that can help make sure everything is locked in tight. It’s also extremely lightweight, at just 1.75 pounds.


    Oregon Gator Mulching Blades

    Gator G5 Blade
    This image links to Amazon.

    If you’re willing to spend a few (and we really do mean a few) extra bucks, check out the Oregon Gator line of mulching blades (check price on Amazon). The blade is 2.5 inches wide, and a little heavier than most, at 3 pounds.

    That means you’ll want to make sure your equipment is in good enough shape to handle the weight before you install it. Their specific patented design means that their mulching blades are capable of clipping grass of all shapes, sizes, and heights.

    Buy on Amazon

    The difference with Gator blades are their uniquely shaped blades. They are really noticeable compared to the average blade your mower arrives with because of the exclusive Gator Mulcher feature on every Gator blade. This detail creates outstanding bagging and discharge efficiency with better bagging, better mulching, and better discharge.

    Using Blade Adapters

    Blade adapters connect your mower’s shaft to your blade. Your stock adapter could have a different blade mounting hole than your mulching blade of choice. In that case you could swap out the adapter to fit. Here is a list of common blade adapters on Amazon for popular consumer lawn mowers. If you want to see one replaced, this video shows the whole process.


    Using A Mulching Kit

    Normally, lawn mowers have a side or rear chute that propels the clippings either onto a lawn to be bagged later or into an attached bag. The mulching kit chops the clippings into significantly smaller pieces so that they decompose much faster.

    The kit itself includes the mulching blade, and the accessories needed to attach the kit, and a plug to fill the mower’s discharge opening so that clippings aren’t blown outward the way they normally are.

    Mulching kits allow you to convert a normal mower to a mulching mower. Mulching kits can be an ideal investment if you already own a mower that suits your needs. It’s also much cheaper to buy a mulching kit than it is to purchase a brand new mower.

    It’s important to note though that if your grass has gotten an inch or two too long, you may want to bag your clippings rather than mulch them. Even the reduced-sized clippings could be a bit long if the grass is too unkempt when you go in with the mower.

    Some folks like to keep the mulching blade on even as they’re bagging because the smaller clippings and leaves are easier to manage.

    Finding the perfect blades for your mower may require some research and understanding what the specifications are for your mower. If you don’t have the owner’s manual for your mower, a simple search on the internet of the model number will provide you with the requirements for your blade purchase.

    Key points to know are the length of the blade, the size, and shape of the hole in the middle of the blade for attaching to the mower, and the number of blades required.

    Find a mulching kit on Amazon

    Most lawn mowers have specific kits built for them, which can be searched easily on Amazon. All you need to do is type in the mower and explore your kit options.

    The prices vary widely, so make sure to do your research, and that you’re able to return something if it doesn’t fit. Amazon is a great option for these types of purchases because they always allow returns.

    Conclusion: These Blades are the Best Way to Save Time and Fertilize Your Lawn

    All in all, NOT mulching is costing you time and money. Mulching mowers allow you to return nutrients to your own lawn, rather than purchasing fertilizer separately, and eliminates the waste of extra products like plastic bags. The question isn’t whether you should mulch, but which of these best mulching blades are right for you and your mowing routine.